YouTube shortsやTiktokなどといった「ショート動画」を作るためのシンプルなツールを作ってみたいと思い、まずはReactで動画編集方法を調べてみたところ「Remotion」を使うのが良さそうだったので、調べてみました。
Remotionは、プログラミングによって動画を作ることができるパッケージであり、Reactの状態管理の仕組みを使って動画を作り込むことができます。
Remotionは主に次の3つで構成されています。
なお、使用条件によってライセンスが異なり、有料プランを契約する必要がある場合があります。詳細は以下を確認してください。
https://www.remotion.pro/license
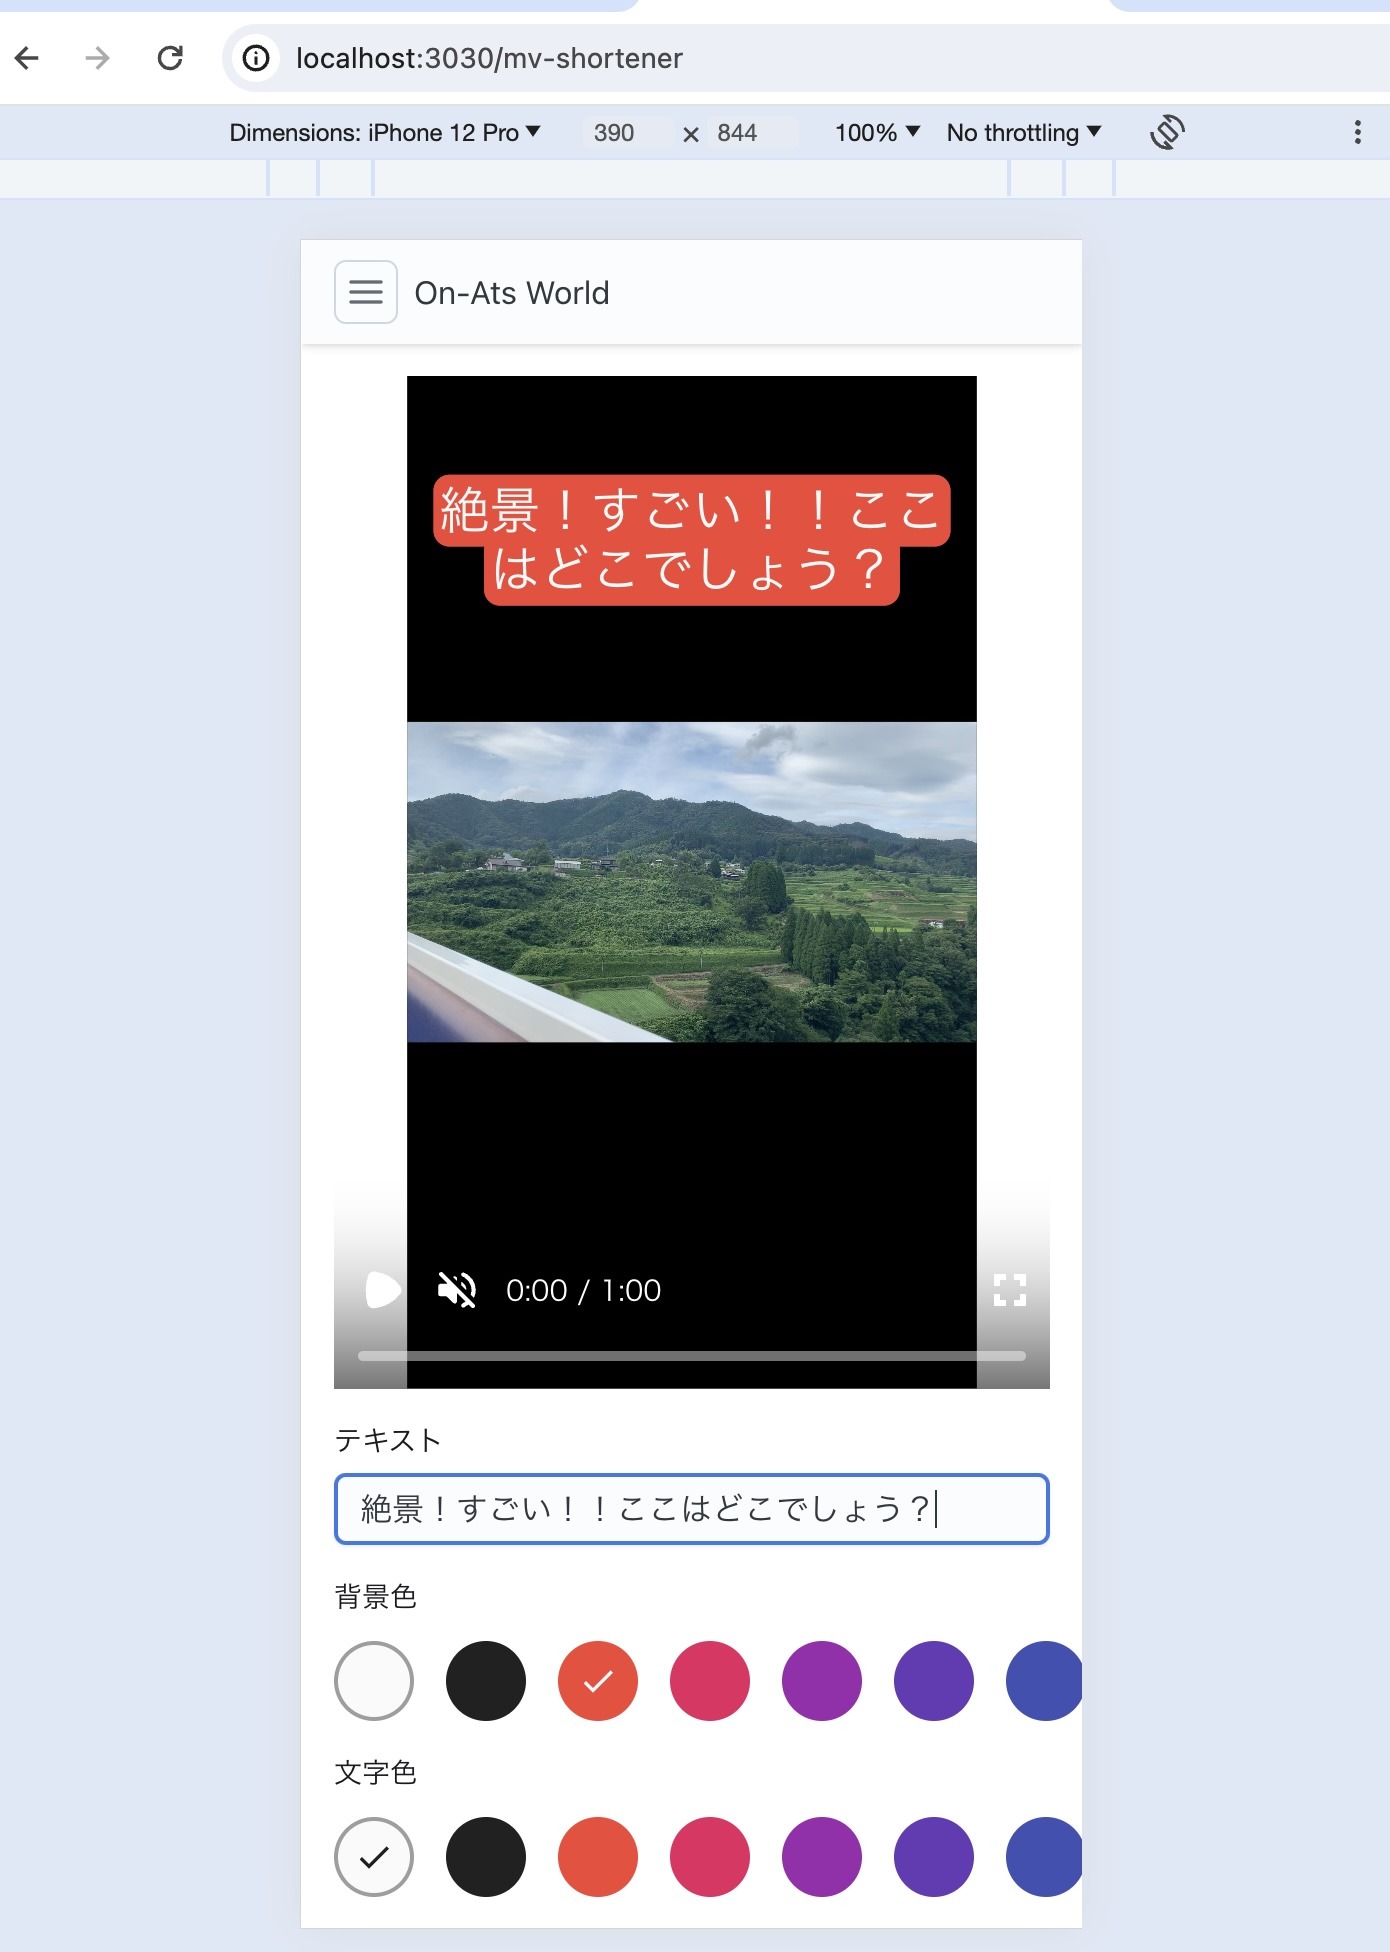
今回は以下のように、ローカルの動画を配置し、タイトルテキストを編集できるアプリケーションを作りたいので、RemotionとRemotion Playerを使って実装してみます。
pnpmでインストールします。
pnpm i remotion @remotion/player
まずは、動画のレンダリング用コンポーネントを作ります。先ほどお見せしたように、上部にタイトル、真ん中に動画が配置されるようなレイアウトを作っていきます。
"use client";

import { AbsoluteFill, Video } from "remotion";
import { CSSProperties } from "react";

export const ShortVideo = ({
  videoUrl,
  title,
  titleStyle,
}: {
  videoUrl: string;
  title: string;
  titleStyle: CSSProperties;
}) => {
  return (
    <AbsoluteFill
      style={{
        background: "black",
      }}
    >
      <div
        style={{
          textAlign: "center",
          marginTop: titleStyle.marginTop,
          marginLeft: 24,
          marginRight: 24,
        }}
      >
        <span
          style={{
            boxDecorationBreak: "clone",
            WebkitBoxDecorationBreak: "clone",
            ...titleStyle,
            marginTop: undefined,
          }}
        >
          {title}
        </span>
      </div>
      <AbsoluteFill style={{ alignItems: "center", justifyContent: "center" }}>
        <Video src={videoUrl} style={{ width: 1080 }} />
      </AbsoluteFill>
    </AbsoluteFill>
  );
};
AbsoluteFillはremotionの便利コンポーネントで、実際には以下のスタイルが適用されているdivです。
const style: React.CSSProperties = {
  top: 0,
  left: 0,
  right: 0,
  bottom: 0,
  width: "100%",
  height: "100%",
  display: "flex",
  flexDirection: "column",
}; Videoもremotionのコンポーネントで、任意の動画ファイルを埋め込むことができます。
ローカルの動画ファイルをすると、Playerが表示され、先ほどのコンポーネントを使った動画がプレビューされるように実装します。
"use client";

import { Player } from "@remotion/player";
import { ShortVideo } from "@/app/mv-shortener/ShortVideo";
import { useCallback, useState } from "react";

export default function MVShortener() {
  const [videoUrl, setVideoUrl] = useState<string | null>(null);

  const handleChange = useCallback(
    async (event: React.ChangeEvent<HTMLInputElement>) => {
      if (event.target.files === null) {
        return;
      }

      const file = event.target.files[0];
      setVideoUrl(URL.createObjectURL(file));
    },
    [],
  );

  if (!videoUrl) {
    return <input type="file" onChange={handleChange} />;
  }

  return (
    <Player
      component={ShortVideo} // 先ほど作ったコンポーネントを指定
      durationInFrames={30 * 60} // 動画の長さをフレーム数で指定 30fps x 60 = 60sec
      compositionWidth={1080} // 動画の横幅
      compositionHeight={1920} // 動画の縦幅
      fps={30} // フレームレート
      controls // 再生・一時停止・シーク・ボリューム調整などのコントロールを表示
      style={{ width: "100%", height: "60vh" }}
      inputProps={{ // ShortVideのPropsを渡す
        videoUrl,
        title: "タイトルです",
        titleStyle: {
          marginTop: 200,
          fontSize: "6rem",
          lineHeight: "7rem",
          backgroundColor: "red",
          borderRadius: "30px",
          border: `10px solid red`,
          color: "white",
        },
      }}
    />
  );
}
まず、動画ファイルの読み込みは <input type="file"で行います。remotionに動画を埋め込むにはURLで渡す必要があるのですが、 URL.createObjectURLで生成したBlob URLを渡したら問題ありませんでした。
動画プレイヤーは Playerコンポーネントを使います。propsの componentに先ほど作った動画レイアウト用のコンポーネントを渡し、 inputPropsに定義したpropsの内容を渡します。
その他に動画のサイズ、長さ、フレームレートなどを指定します。
タイトルテキストの編集機能を付け加えます。今回は、テキスト・文字色・背景色を変更できるようにします。UIはJoy UIで構築しています。
"use client";

import { Player } from "@remotion/player";
import { ShortVideo } from "@/app/mv-shortener/ShortVideo";
import {
  FormControl,
  FormLabel,
  Input,
  Stack,
  Tab,
  TabList,
  TabPanel,
  Tabs,
} from "@mui/joy";
import { useCallback, useMemo, useState } from "react";
import { grey, red } from "@mui/material/colors";
import ColorPicker from "@/app/mv-shortener/ColorPicker";

export default function MVShortener() {
  const [videoUrl, setVideoUrl] = useState<string | null>(null);
  const [title, setTitle] = useState<string>("タイトル");
  const [bgColor, setBgColor] = useState<string>(red[500]);
  const [titleColor, setTitleColor] = useState<string>(grey[50]);

  const titleStyle = useMemo(
    () => ({
      marginTop: 200,
      fontSize: "6rem",
      lineHeight: "7rem",
      backgroundColor: bgColor,
      borderRadius: "30px",
      border: `10px solid ${bgColor}`,
      color: titleColor,
    }),
    [bgColor, titleColor],
  );

  const handleChange = useCallback(
    async (event: React.ChangeEvent<HTMLInputElement>) => {
      if (event.target.files === null) {
        return;
      }

      const file = event.target.files[0];
      setVideoUrl(URL.createObjectURL(file));
    },
    [],
  );

  if (!videoUrl) {
    return <input type="file" onChange={handleChange} />;
  }

  return (
    <>
      {videoUrl && (
        <Player
          component={ShortVideo}
          durationInFrames={30 * 60}
          compositionWidth={1080}
          compositionHeight={1920}
          fps={30}
          controls
          style={{ width: "100%", height: "60vh", position: "sticky" }}
          inputProps={{ videoUrl, title, titleStyle }}
        />
      )}
      <Stack spacing={2} sx={{ mt: 2 }}>
        <FormControl>
          <FormLabel>テキスト</FormLabel>
          <Input
            fullWidth
            value={title}
            onChange={(e) => setTitle(e.target.value)}
          />
        </FormControl>
        <ColorPicker label="背景色" value={bgColor} onChange={setBgColor} />
        <ColorPicker
          label="文字色"
          value={titleColor}
          onChange={setTitleColor}
        />
      </Stack>
    </>
  );
}
テキスト・文字色・背景色をstate化し、それぞれを値を変更できるフォームを用意しました。これで、UI上でタイトルテキストを編集できるようなりました。
上記で使用されている ColorPickerコンポーネントは、Joy UIのサンプルをベースに作ってみたものです。中身は以下のような感じになっています。
import { FormLabel, Radio, radioClasses, RadioGroup, Sheet } from "@mui/joy";
import {
  amber,
  blue,
  blueGrey,
  brown,
  cyan,
  deepOrange,
  deepPurple,
  green,
  grey,
  indigo,
  lightBlue,
  lightGreen,
  lime,
  orange,
  pink,
  purple,
  red,
  teal,
  yellow,
} from "@mui/material/colors";
import { Done } from "@mui/icons-material";
import Box from "@mui/joy/Box";
import { ReactNode } from "react";

export default function ColorPicker({
  label,
  value,
  onChange,
}: {
  label: ReactNode;
  value: string;
  onChange: (color: string) => void;
}) {
  return (
    <Box>
      <FormLabel
        id="product-color-attribute"
        sx={{
          mb: 1.5,
        }}
      >
        {label}
      </FormLabel>
      <RadioGroup
        aria-labelledby="product-color-attribute"
        value={value}
        onChange={(e) => onChange(e.target.value)}
        sx={{
          gap: 2,
          mx: -2,
          px: 2,
          flexDirection: "row",
          overflowX: "auto",
          overflowY: "hidden",
        }}
      >
        {(
          [
            grey[50],
            grey[900],
            red[500],
            pink[500],
            purple[500],
            deepPurple[500],
            indigo[500],
            blue[500],
            lightBlue[500],
            cyan[500],
            teal[500],
            green[500],
            lightGreen[500],
            lime[500],
            yellow[500],
            amber[500],
            orange[500],
            deepOrange[500],
            brown[500],
            grey[500],
            blueGrey[500],
          ] as const
        ).map((color) => (
          <Sheet
            key={color}
            sx={{
              position: "relative",
              width: 40,
              height: 40,
              flexShrink: 0,
              bgcolor: color,
              borderRadius: "50%",
              display: "flex",
              alignItems: "center",
              justifyContent: "center",
              border: color === grey[50] ? `2px solid ${grey[500]}` : undefined,
            }}
          >
            <Radio
              overlay
              variant="solid"
              checkedIcon={
                <Done
                  fontSize="large"
                  htmlColor={color === grey[50] ? grey[900] : grey[50]}
                />
              }
              value={color}
              slotProps={{
                input: { "aria-label": color },
                radio: {
                  sx: {
                    display: "contents",
                    "--variant-borderWidth": "2px",
                  },
                },
              }}
              sx={{
                "--joy-focus-outlineOffset": "4px",
                [`& .${radioClasses.action}.${radioClasses.focusVisible}`]: {
                  outlineWidth: "2px",
                },
                bgcolor: color,
              }}
            />
          </Sheet>
        ))}
      </RadioGroup>
    </Box>
  );
}
ここまでは良い感じでした。ただ、ブラウザで動画書き出しできないというのは痛いです。なんとかブラウザで動画書き出しする方法がないか調べてみたいと思います。