こんにちは。miyagawaです。つい最近、ポケモン剣盾を衝動買いしてしました。BW2から全く買っていなかったので、3Dのマップはとても新鮮です。
今回はKotlin、Retrofitを使用してAPI通信の処理を実装したいと思います。
使用するAPIはpokeapiです。
ポケモンのいろいろなデータをまとめられているので、このデータを用いて図鑑番号検索アプリを作ってみたいと思います。
新しくプロジェクトを作成し、build.gradle(app)に下記を追加します。
最新版の2.7.1(2020年1月時点)を導入します。
// retrofit
    def retrofitVer = '2.6.4'
    implementation "com.squareup.retrofit2:retrofit:$retrofitVer"
    implementation "com.squareup.retrofit2:adapter-rxjava:$retrofitVer"
    implementation "com.squareup.retrofit2:adapter-rxjava2:$retrofitVer"
    implementation "com.squareup.retrofit2:converter-gson:$retrofitVer"

    // recyclerView
    implementation 'com.android.support:recyclerview-v7:28.0.0'

    // Glide
    implementation 'com.github.bumptech.glide:glide:4.9.0'

    // okhttp
    implementation 'com.squareup.okhttp3:logging-interceptor:4.2.1'

    // rx
    implementation 'io.reactivex.rxjava2:rxandroid:2.1.1'
上記の追加が完了したら、syncを行います。
また、HTTP通信を許容するため、AndroidManifest.xmlに下記を追記します。
準備ができたら、次はレイアウトファイルの作成を行います。activity_main.xmlを下記のように設定します。
list_item_pokemon.xmlを作成します。
レイアウトファイルを整えた後、PokemonInfo.ktというデータクラスファイルを作成します。
import io.reactivex.Observable
import retrofit2.http.GET
import retrofit2.http.Path

interface PokemonInfo {
    @GET("pokemon-form/{id}")
    fun pokemonInfo(@Path("id") pokemonId: Int): Observable
} pokemonInfoメソッドを呼び出すことによって番号を検索するようにしています。@GETはAPIGETを示しており、()内のものは後ほど登場するBaseURLの後に続くエンドポイントを記載します。
今回の場合はポケモンの図鑑番号を検索したいので、idを渡し、それをパラメーターに含めるようにしています。
PokemonListAdapter.ktファイルを作成します。
import android.content.Context
import android.view.LayoutInflater
import android.view.View
import android.view.ViewGroup
import android.widget.ImageView
import android.widget.LinearLayout
import android.widget.TextView
import androidx.core.view.isVisible
import androidx.recyclerview.widget.RecyclerView
import com.bumptech.glide.Glide

internal class PokemonListAdapter(private val context: Context): RecyclerView.Adapter() {
    private var pokemonData: PokemonData =
        PokemonData(0, "",
            PokemonData.Pokemon("", ""),
            PokemonData.Sprites("","","",""),
            PokemonData.Version("","")
        )

    fun setPokemonData(data: PokemonData) {
        pokemonData = data
    }

    override fun onCreateViewHolder(parent: ViewGroup, viewType: Int): RecyclerView.ViewHolder {
        val view = LayoutInflater.from(parent.context)
            .inflate(R.layout.list_item_pokemon,
                parent,
                false)
        return PokemonInfoHolder(view)
    }

    override fun getItemCount(): Int {
        return 5
    }

    override fun onBindViewHolder(holder: RecyclerView.ViewHolder, position: Int) {
        (holder as PokemonInfoHolder).bind(position)
    }

    private inner class PokemonInfoHolder(itemView: View) : RecyclerView.ViewHolder(itemView) {
        private val nameArea: LinearLayout
        private val formArea: LinearLayout
        private val nameTextView: TextView
        private val formNameView: TextView
        private val imageView: ImageView

        init {
            nameArea = itemView.findViewById(R.id.pokemonNameListItemView)
            formArea = itemView.findViewById(R.id.formListItemView)
            nameTextView = itemView.findViewById(R.id.pokemonNameTextView)
            formNameView = itemView.findViewById(R.id.pokemonFormNameTextView)
            imageView = itemView.findViewById(R.id.pokemonImageView)
        }

        internal fun bind(position: Int) {
            nameArea.isVisible = position == 0
            formArea.isVisible = position != 0
            var spriteUrl = ""
            when (position) {
                0 -> {
                    nameTextView.text = pokemonData.pokemon.name
                }
                1 -> {
                    formNameView.text = "通常のすがた(前)"
                    spriteUrl = pokemonData.sprites.front_default
                }
                2 -> {
                    formNameView.text = "色違いのすがた(前)"
                    spriteUrl = pokemonData.sprites.front_shiny
                }
                3 -> {
                    formNameView.text = "通常のすがた(後)"
                    spriteUrl = pokemonData.sprites.back_default
                }
                4 -> {
                    formNameView.text = "色違いのすがた(後)"
                    spriteUrl = pokemonData.sprites.back_shiny
                }
            }

            Glide.with(context)
                .asBitmap()
                .load(spriteUrl)
                .into(imageView)
        }
    }

}
RecyclerView、Glideの使い方に関しては別の記事にまとめているので、是非みてみてください。
【Kotlin】RecyclerViewAdapterを使ってリスト表示
【Kotlin】Glideで角丸の画像を作成する
MainActivity.ktファイルを下記のように調整します。
import android.annotation.SuppressLint
import androidx.appcompat.app.AppCompatActivity
import android.os.Bundle
import androidx.recyclerview.widget.LinearLayoutManager
import com.google.gson.FieldNamingPolicy
import com.google.gson.GsonBuilder
import io.reactivex.schedulers.Schedulers
import io.reactivex.android.schedulers.AndroidSchedulers
import kotlinx.android.synthetic.main.activity_main.*
import retrofit2.Retrofit
import retrofit2.adapter.rxjava2.RxJava2CallAdapterFactory
import retrofit2.converter.gson.GsonConverterFactory

class MainActivity : AppCompatActivity() {
    private lateinit var adapter : PokemonListAdapter

    override fun onCreate(savedInstanceState: Bundle?) {
        super.onCreate(savedInstanceState)
        setContentView(R.layout.activity_main)

        initView()
    }

    private fun initView() {
        val linearLayoutManager = LinearLayoutManager(this)
        linearLayoutManager.orientation = LinearLayoutManager.VERTICAL

        resultRecyclerView.layoutManager = linearLayoutManager
        adapter = PokemonListAdapter(this)
        resultRecyclerView.adapter = adapter

        apiGetButton.setOnClickListener {
            // ボタンが押されたときにeditTextから番号を取得する。
            if (pokemonIdEditText.text.isNotEmpty()) {
                // Pokemonの検索
                getPokemon(pokemonIdEditText.text.toString().toInt())
            }
        }
    }

    @SuppressLint("CheckResult")
    private fun getPokemon(id: Int) {
        val gson = GsonBuilder()
            .setFieldNamingPolicy(FieldNamingPolicy.LOWER_CASE_WITH_UNDERSCORES)
            .create() //

        val retrofit = Retrofit.Builder()
            .baseUrl("https://pokeapi.co/api/v2/")
            .addConverterFactory(GsonConverterFactory.create(gson))
            .addCallAdapterFactory(RxJava2CallAdapterFactory.create())
            .build()


        val client = retrofit.create(PokemonInfo::class.java)
        client.pokemonInfo(id)
            .subscribeOn(Schedulers.io())
            .observeOn(AndroidSchedulers.mainThread())
            .subscribe({
                adapter.setPokemonData(it)
                adapter.notifyDataSetChanged()
            }, {
                it.printStackTrace()
            })
    }
}
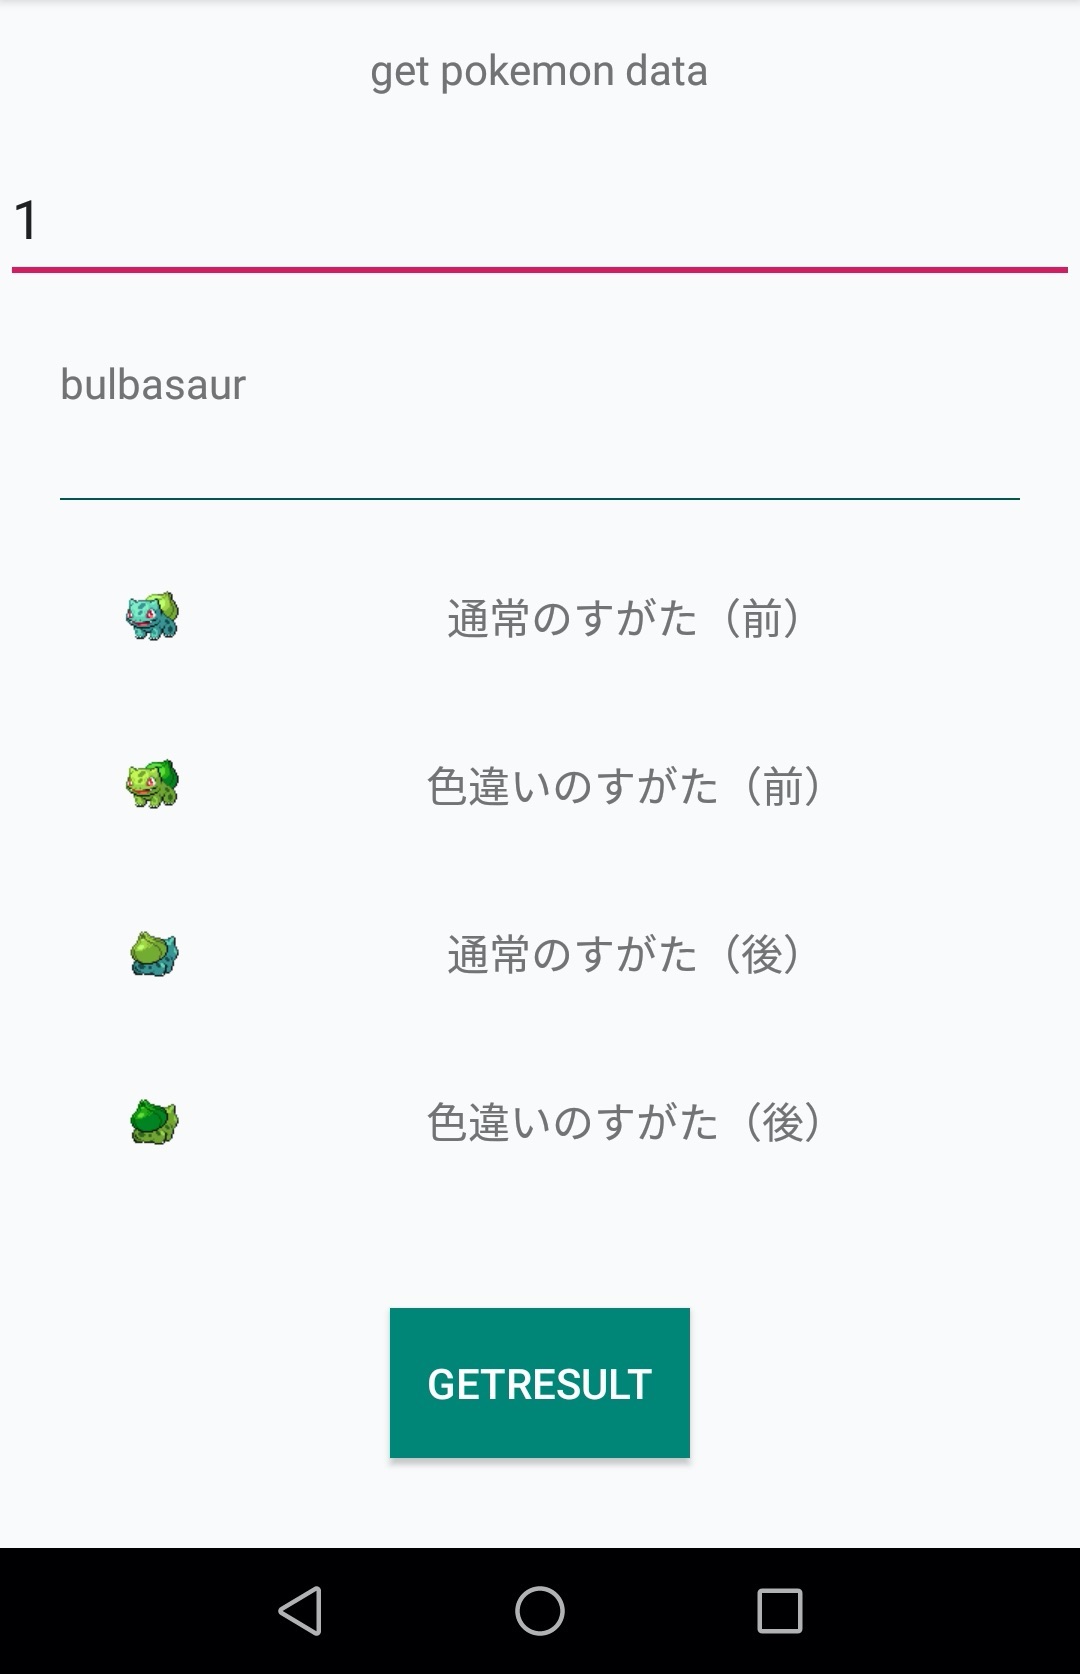
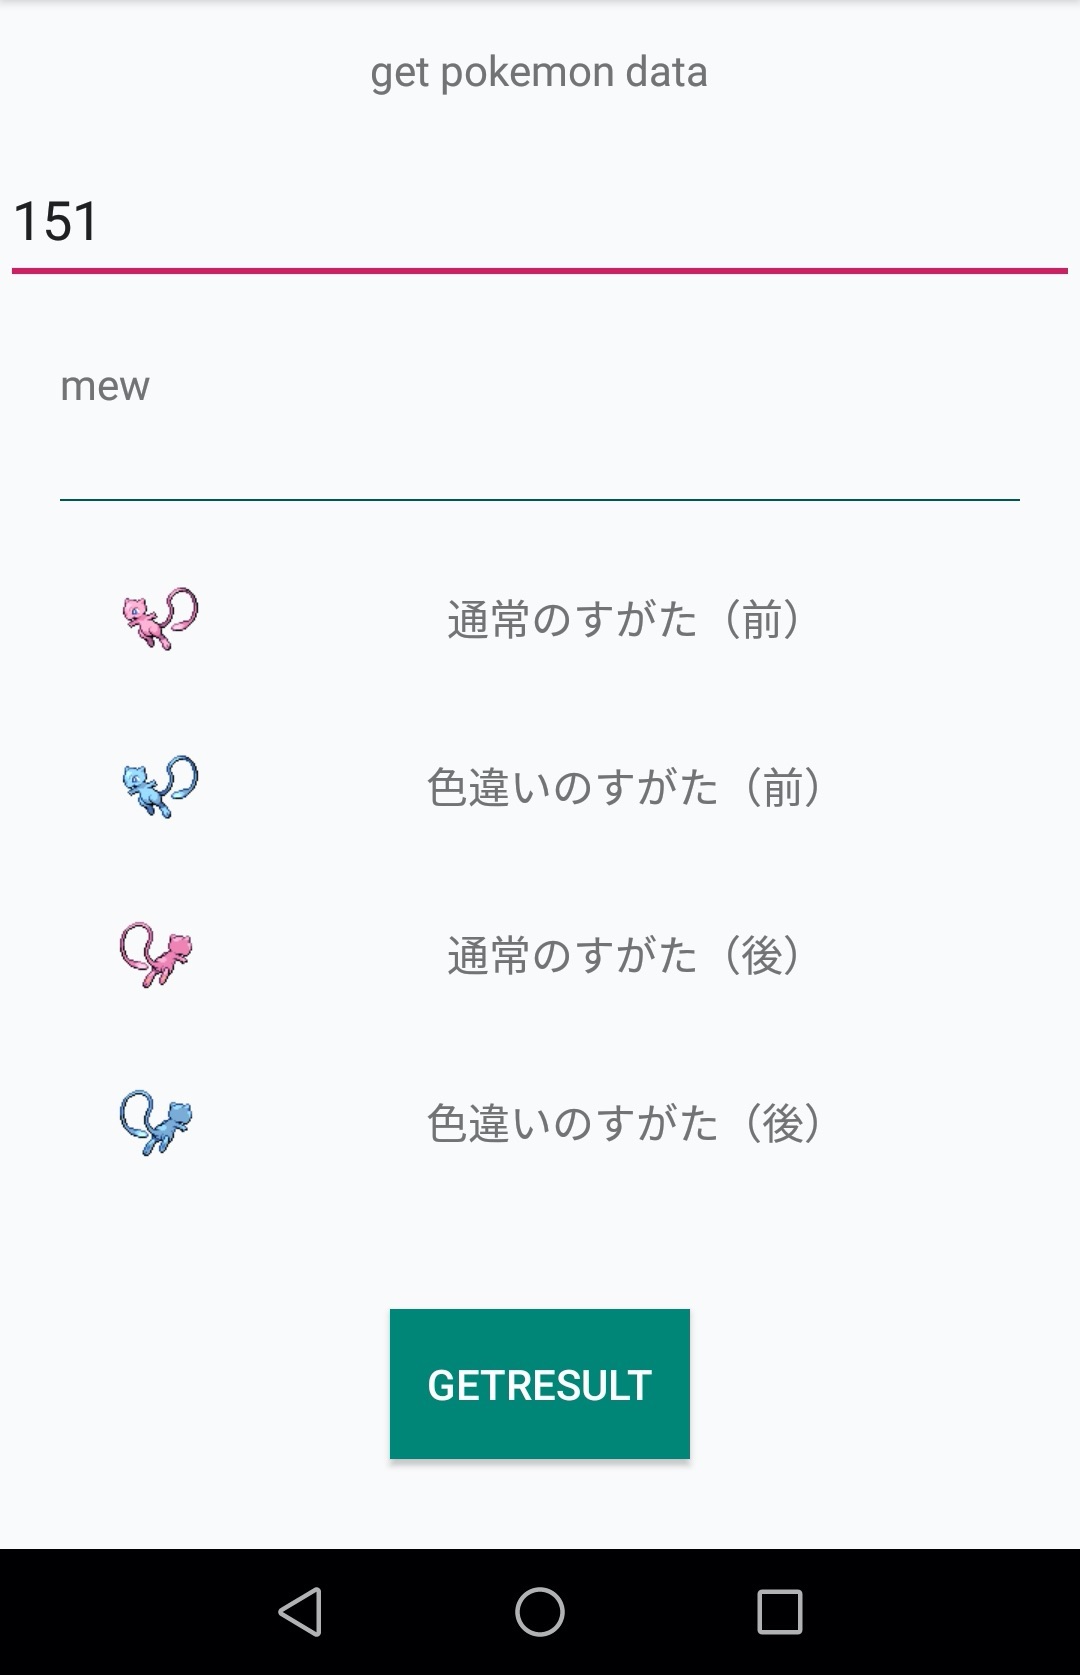
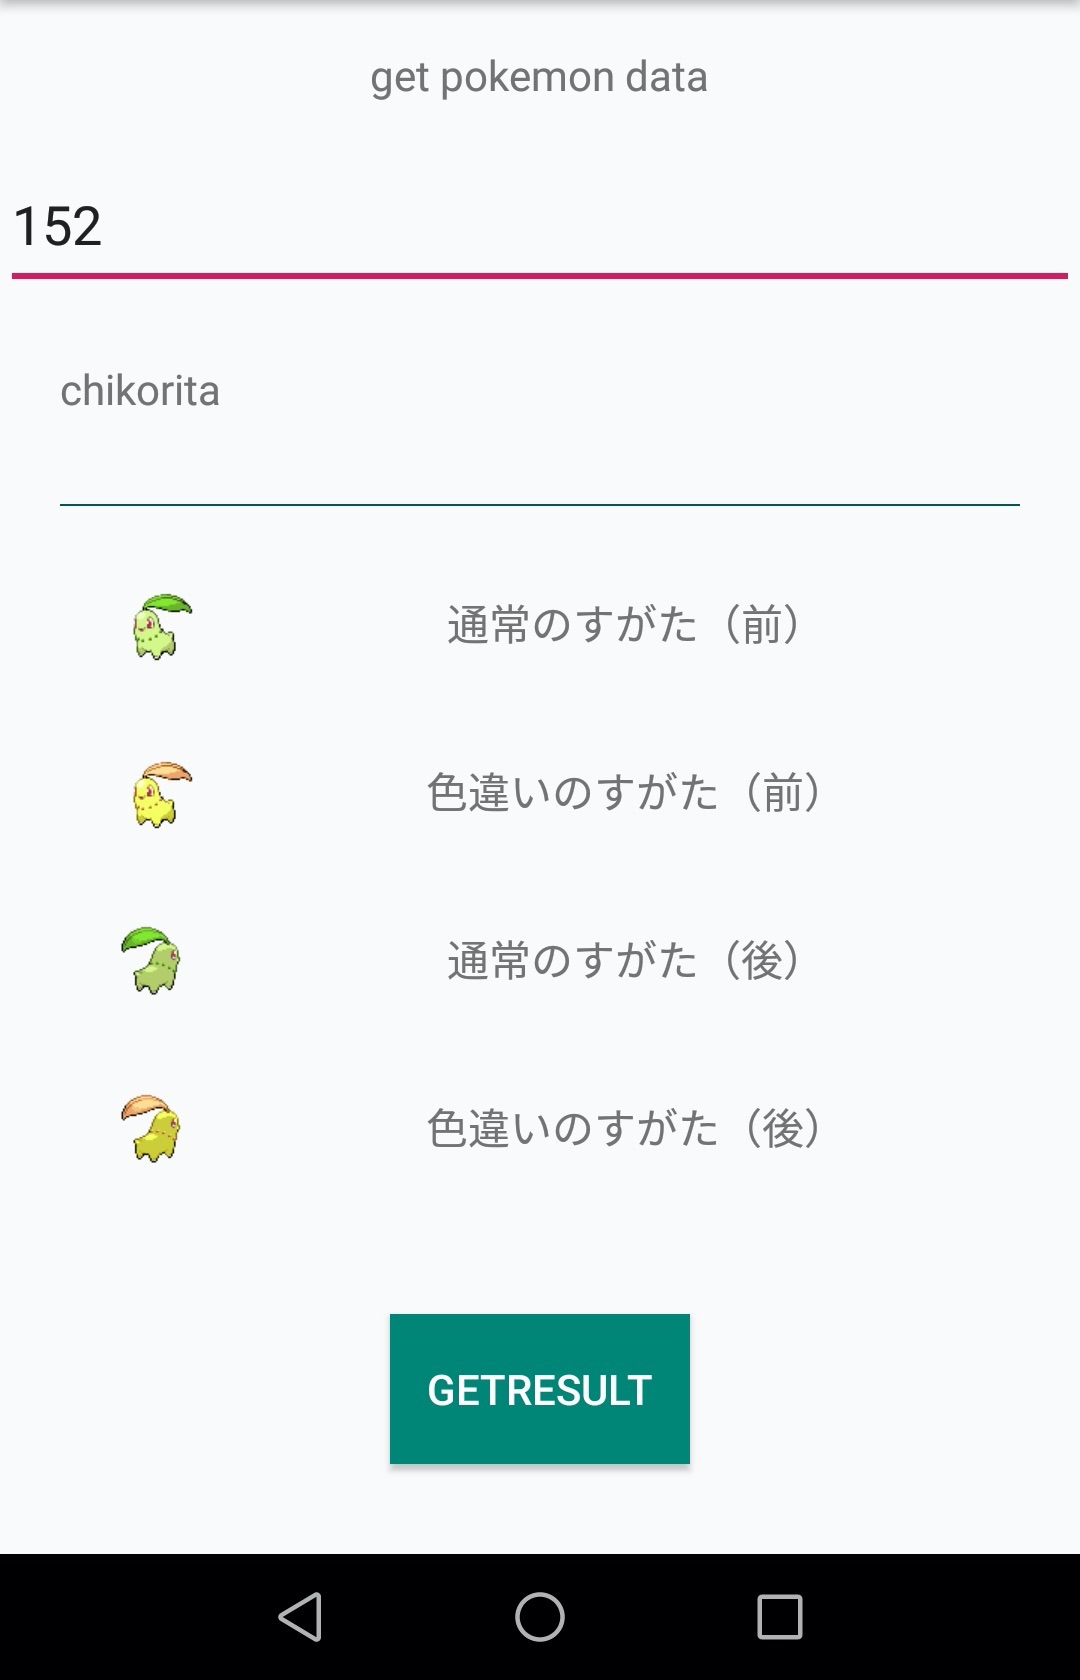
上記のコードを実装すると、下の画像のようにポケモンを図鑑番号で検索することが可能になります。
かわいいですね!
今回はRetrofitを使用してポケモンを検索するアプリを作ってみました。今後もRetrofitは使うと思うので、備忘録としてよかったのではないかなと思います。