Stripe Connectには、資金の流れとして大きくダイレクト支払いとデスティネーション支払いという流れがあります。
ダイレクト支払いは、Shopifyのように、ユーザにプラットフォームの存在を意識させないようなSaaSを運営する際に適しています。ショップに送金された金額の一部を、手数料としてプラットフォームに入れることができます。
デスティネーション支払いは、楽天市場のようなマーケットプレイス型のWebサイトを運営する際に適しています。一度すべての金額がプラットフォーム側に入り、それをプラットフォームの裁量で店舗側に配分することができます。
そのため、支払方法をまとめたいというユースケースは、通常デスティネーション支払いの方が適していると思いますが、今回は個人間で送金・返金できるマッチングサービスのようなサービスを作りたいと思うので、ダイレクト支払い方式を使用しますが、クレジットカードの管理は一か所にしたいと思います。
ダイレクト支払いの場合は前回説明した通り、Connectアカウントごとに顧客管理する形になります。この場合、顧客は店舗ごとに支払方法を登録しなければなりません。その手間を省くためには、支払方法をクローンすることで解決できます。今回は支払方法のクローンについて紹介します。
今回は、前回の記事の続きになります。前回の記事はこちら。
前回までの記事では触れませんでしたが、今回はプラットフォームの顧客が必要になるので、顧客登録・支払方法の登録を実装していきます。
まずは、プラットフォームの顧客を登録します。決済時にこの顧客から支払方法をクローンするため、サイトの登録時にサイトプラットフォームの顧客を登録するようにします。
・・・前略・・・
class RegisteredUserController extends Controller
{
    public function store(Request $request)
    {
        $request->validate([
            'name' => 'required|string|max:255',
            'email' => 'required|string|email|max:255|unique:users',
            'password' => 'required|string|confirmed|min:8',
        ]);

        Auth::login($user = User::create([
            'name' => $request->name,
            'email' => $request->email,
            'password' => Hash::make($request->password),
        ]));

        event(new Registered($user));

        // Stripeプラットフォーム顧客の登録
        Stripe::setApiKey(env('STRIPE_SECRET'));
        $customer = Customer::create([
            'email' => $user->email
        ]);
        // 登録したStripe顧客をusersテーブルに登録する。
        $user->stripe_customer_id = $customer->id;
        $user->save();

        return redirect(RouteServiceProvider::HOME);
    }
}
作成した顧客に対して、支払方法を登録できるようにします。
まず、ルーティングです。前回作成したものに追記します。
web.php
<?php

use Illuminate\Support\Facades\Route;

Route::get('/update_payment_method', [\App\Http\Controllers\UserController::class, 'editPaymentMethod']);
Route::post('/update_payment_method', [\App\Http\Controllers\UserController::class, 'updatePaymentMethod']);
次に、controllerです。
<?php

namespace App\Http\Controllers;

use Illuminate\Http\Request;
use Illuminate\Support\Facades\Auth;
use Stripe\Customer;
use Stripe\PaymentMethod;
use Stripe\Stripe;

class UserController extends Controller
{
    /**
     * 支払方法変更画面
     */    public function editPaymentMethod()
    {
        Stripe::setApiKey(env('STRIPE_SECRET'));
        // 顧客の現在の支払方法を表示用に取得
        $user = Auth::guard('web')->user();

        $customer = Customer::retrieve($user->stripe_customer_id);
        $defaultPaymentMethodId = $customer->invoice_settings['default_payment_method'] ?? null;
        $defaultPaymentMethod = $defaultPaymentMethodId === null ? null : PaymentMethod::retrieve($defaultPaymentMethodId);
        return view('edit_payment_method', compact('defaultPaymentMethod'));
    }

    /**
     * 支払方法変更処理
     */    public function updatePaymentMethod(Request $request)
    {
        Stripe::setApiKey(env('STRIPE_SECRET'));
        // 顧客の現在の支払方法を表示用に取得
        $user = Auth::guard('web')->user();

        $customer = Customer::retrieve($user->stripe_customer_id);

        // リクエストパラメータのpayment_method_idから、PaymentMethodを取得し、プラットフォーム顧客にアタッチする
        $paymentMethod = PaymentMethod::retrieve($request->payment_method_id);
        $paymentMethod->attach(['customer' => $customer->id]);

        // 顧客のデフォルトの支払方法を変更する
        $customer->invoice_settings = ['default_payment_method' => $paymentMethod->id];
        $customer->save();
        return redirect('/update_payment_method');
    }
} 支払方法の登録はプラットフォーム顧客に対して行うため、ここではまだConnectアカウントは登場しません。function editPaymentMethod()では、支払方法登録ページを表示しています。支払い方法が登録済みのユーザ向けに、現在のクレカ番号の下4ケタを表示するため、顧客と支払方法を取得しています。function updatePaymentMethod()では、実際に支払方法を変更します。顧客に支払方法を登録した後、デフォルトの支払方法を変更することで、以降に申し込むサブスクリプションはこの支払方法が使用されます。
最後に、viewの実装です。基本的には、前回までに作った支払ページと同じです。
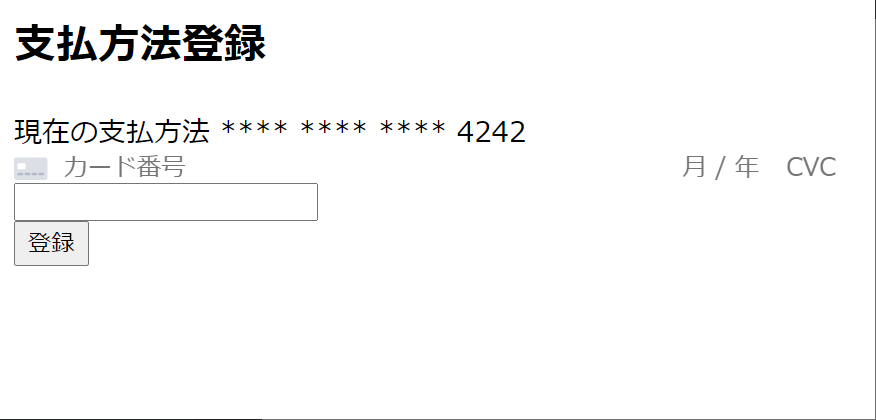
<h2>支払方法登録</h2>
{{-- 支払方法が登録されている場合は、下4桁を表示する。 --}}
現在の支払方法 **** **** **** {{ $defaultPaymentMethod->card->last4 ?? 'なし' }}
<form id="payment-form">
    <div id="card-element">
        <!-- カード番号・有効期限・CVCの入力が表示されます -->
    </div>
    <input type="text" id="name">

    <!-- エラーメッセージの表示 -->
    <div id="card-element-errors" role="alert"></div>
    <button type="submit">登録</button>
</form>

<form id="update-payment-form" method="post" action="/update_payment_method">
    @csrf
    <input type="hidden" name="payment_method_id" id="payment-method-id">
</form>

<script src="https://js.stripe.com/v3/"></script>
<script>
    // カード情報入力の表示
    let stripe = Stripe('{{ env('STRIPE_PUBLIC') }}');
    let elements = stripe.elements();
    let card = elements.create('card');
    card.mount('#card-element');

    card.on('change', function (event) {
        displayError(event);
    });
    function displayError(event) {
        let displayError = document.getElementById('card-element-errors');
        if (event.error) {
            displayError.textContent = event.error.message;
        } else {
            displayError.textContent = '';
        }
    }

    // カード情報をStripeに送信
    var form = document.getElementById('payment-form');

    form.addEventListener('submit', function (ev) {
        ev.preventDefault();
        createPaymentMethod();
    });

    function createPaymentMethod() {
        let billingName = document.querySelector('#name').value;

        stripe
            .createPaymentMethod({
                type: 'card',
                card: card,
                billing_details: {
                    name: billingName,
                }
            })
            .then((result) => {
                if (result.error) {
                    displayError(result);
                } else {
                    // 支払方法をStripeに送信すると、paymentMethodが取得できるので、それをPOSTする。
                    var form = document.getElementById('update-payment-form');
                    document.getElementById('payment-method-id').value = result.paymentMethod.id;
                    form.submit();
                }
            });
    }
</script>
ここまで作成すると、このような画面でプラットフォーム顧客の支払方法を登録することができるようになります。
前回までの記事までで、Connectを使用してサブスクリプション製品を登録するところまで実装済みです。まだの方は前回の記事を参考にしてください。
支払方法がプラットフォーム顧客に登録できたところで、今度は実際に支払方法をクローンしたうえでサブスクリプション登録するところを説明します。
前回作成したProductControllerの subscribe()を編集します。
まずは、支払方法(PaymentMethod)をクローンします。
            $user = Auth::guard('web')->user();
            $platformCustomer = Customer::retrieve($user->stripe_customer_id);

            // 支払方法のクローン
            $clonedPaymentMethod = PaymentMethod::create([
                'payment_method' => $platformCustomer->invoice_settings['default_payment_method'],
                'customer' => $platformCustomer->id
            ], [
                'stripe_account' => $product->shop->stripe_account_id
            ]);
PaymentMethod::create() の第一引数のパラメータにクローン元の支払方法を指定することで、支払方法をクローンできます。また、併せてプラットフォーム顧客を指定する必要があります。
また、第二引数のパラメータに stripe_accountを設定することで、Connectアカウントに紐づく支払方法となります。
            // 顧客のクローン
            $customer = Customer::create([
                'email' => $user->email,
                'payment_method' => $clonedPaymentMethod->id,
                'invoice_settings' => ['default_payment_method' => $clonedPaymentMethod->id]
            ], [
                'stripe_account' => $product->shop->stripe_account_id
]); emailは後で実装する顧客重複チェック用に登録します。payment_methodは先ほどクローンした支払方法を指定します。invoice_settings.default_payment_methodも同じく先ほどクローンした支払方法を指定します。これを指定することで、この後のサブスクリプション登録で、紐づけた支払方法が使用されます。
先ほどと同じく第二引数に stripe_accountを指定することで、Connectアカウントに紐づく顧客になります。
        Subscription::create([
            'customer' => $customer->id,
            'items' => [[
                'price' => $product->stripe_price_id
            ]]
        ], [
            'stripe_account' => $product->shop->stripe_account_id
]); 最後に、サブスクリプション登録を行います。以下のようにパラメータ設定を行います。customerには先ほどクローンした顧客IDを指定します。itemsは課金アイテムを指定します。
第二引数は、先ほど同じようにConnectアカウントを指定します。
    public function subscribe(Request $request, Product $product)
    {
        Stripe::setApiKey(env('STRIPE_SECRET'));
        $user = Auth::guard('web')->user();

        // 店舗の顧客の重複チェック
        $customers = Customer::all(
            ['email' => $user->email],
            ['stripe_account' => $product->shop->stripe_account_id]
        );
        $customer = null;
        if ($customers->count() > 0) {
            // 既に顧客が存在する場合は、それを使う
            $customer = $customers->first();
        } else {
            $platformCustomer = Customer::retrieve($user->stripe_customer_id);

            // 支払方法のクローン
            $clonedPaymentMethod = PaymentMethod::create([
                'payment_method' => $platformCustomer->invoice_settings['default_payment_method'],
                'customer' => $platformCustomer->id
            ], [
                'stripe_account' => $product->shop->stripe_account_id
            ]);

            // 顧客のクローン
            $customer = Customer::create([
                'email' => $user->email,
                'payment_method' => $clonedPaymentMethod->id,
                'invoice_settings' => ['default_payment_method' => $clonedPaymentMethod->id]
            ], [
                'stripe_account' => $product->shop->stripe_account_id
            ]);
        }

        // 課金登録
        Subscription::create([
            'customer' => $customer->id,
            'items' => [[
                'price' => $product->stripe_price_id
            ]]
        ], [
            'stripe_account' => $product->shop->stripe_account_id
        ]);
    }
店舗の顧客の重複チェックは、前回実装したものと同じロジックです。また、すでに店舗顧客が存在する場合は、その顧客に紐づいている支払方法を使用すればよいので、新たにクローンは行いません。
支払方法をクローンする流れに変更したため、以前までサブスクリプション登録ページにあった支払方法の登録フォームを削除し、シンプルな形にしたいと思います。
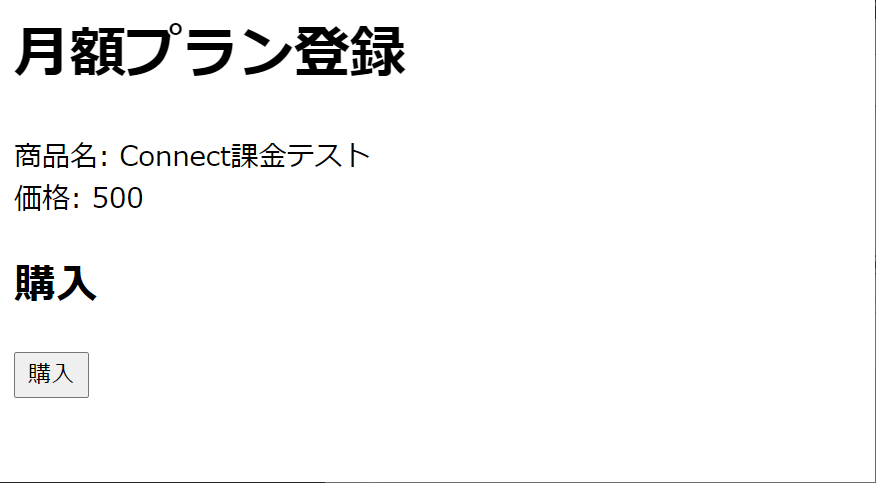
<h1>月額プラン登録</h1>
商品名: {{ $product->name }}<br>
価格: {{ $product->price }}

<h2>購入</h2>

<form id="update-payment-form" method="post" action="/products/{{ $product->id }}/subscribe">
    @csrf
    <button type="submit">購入</button>
</form>
ここまで作成すると、以下のような画面でサブスクリプションを登録できます。店舗をまたいでも、プラットフォーム顧客に登録してある支払方法を使用できるので、顧客がいちいち支払方法を入力する手間を省くことができます。
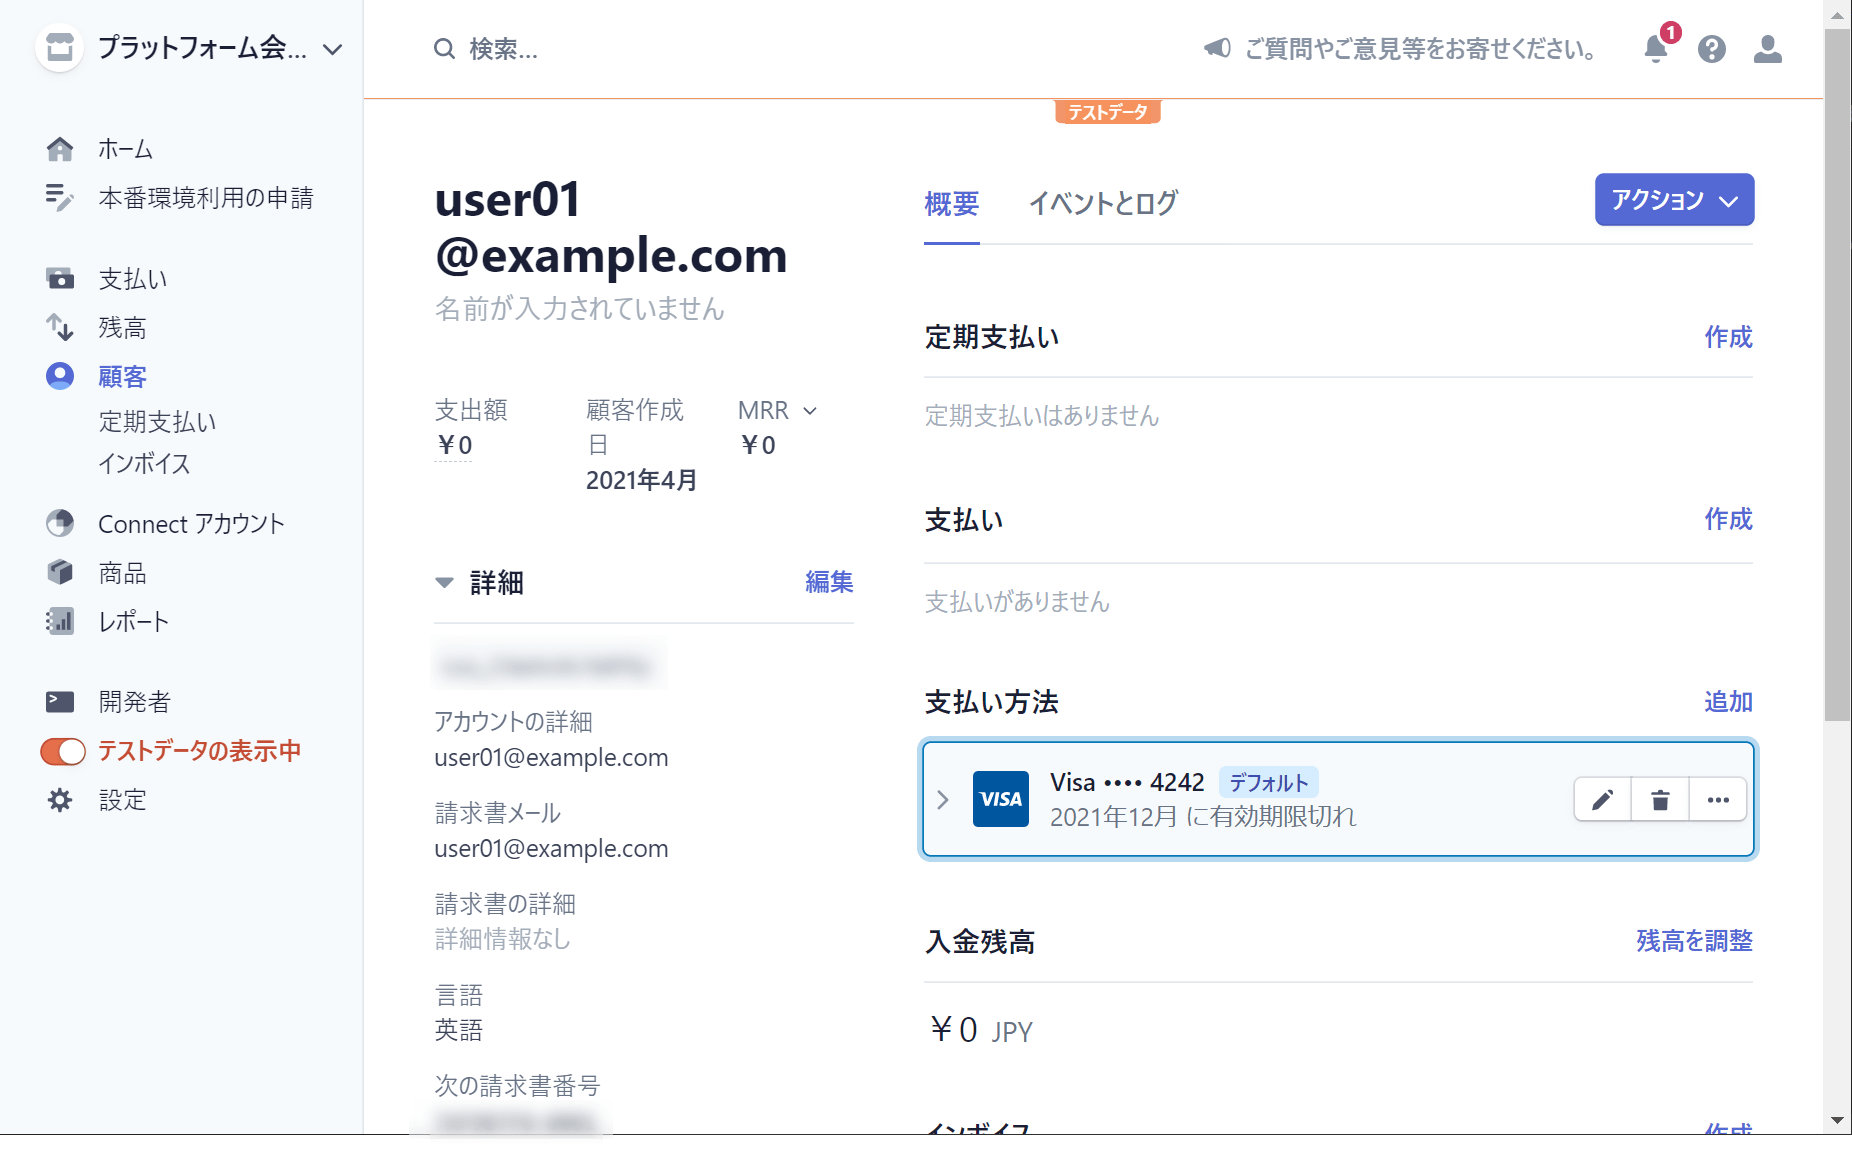
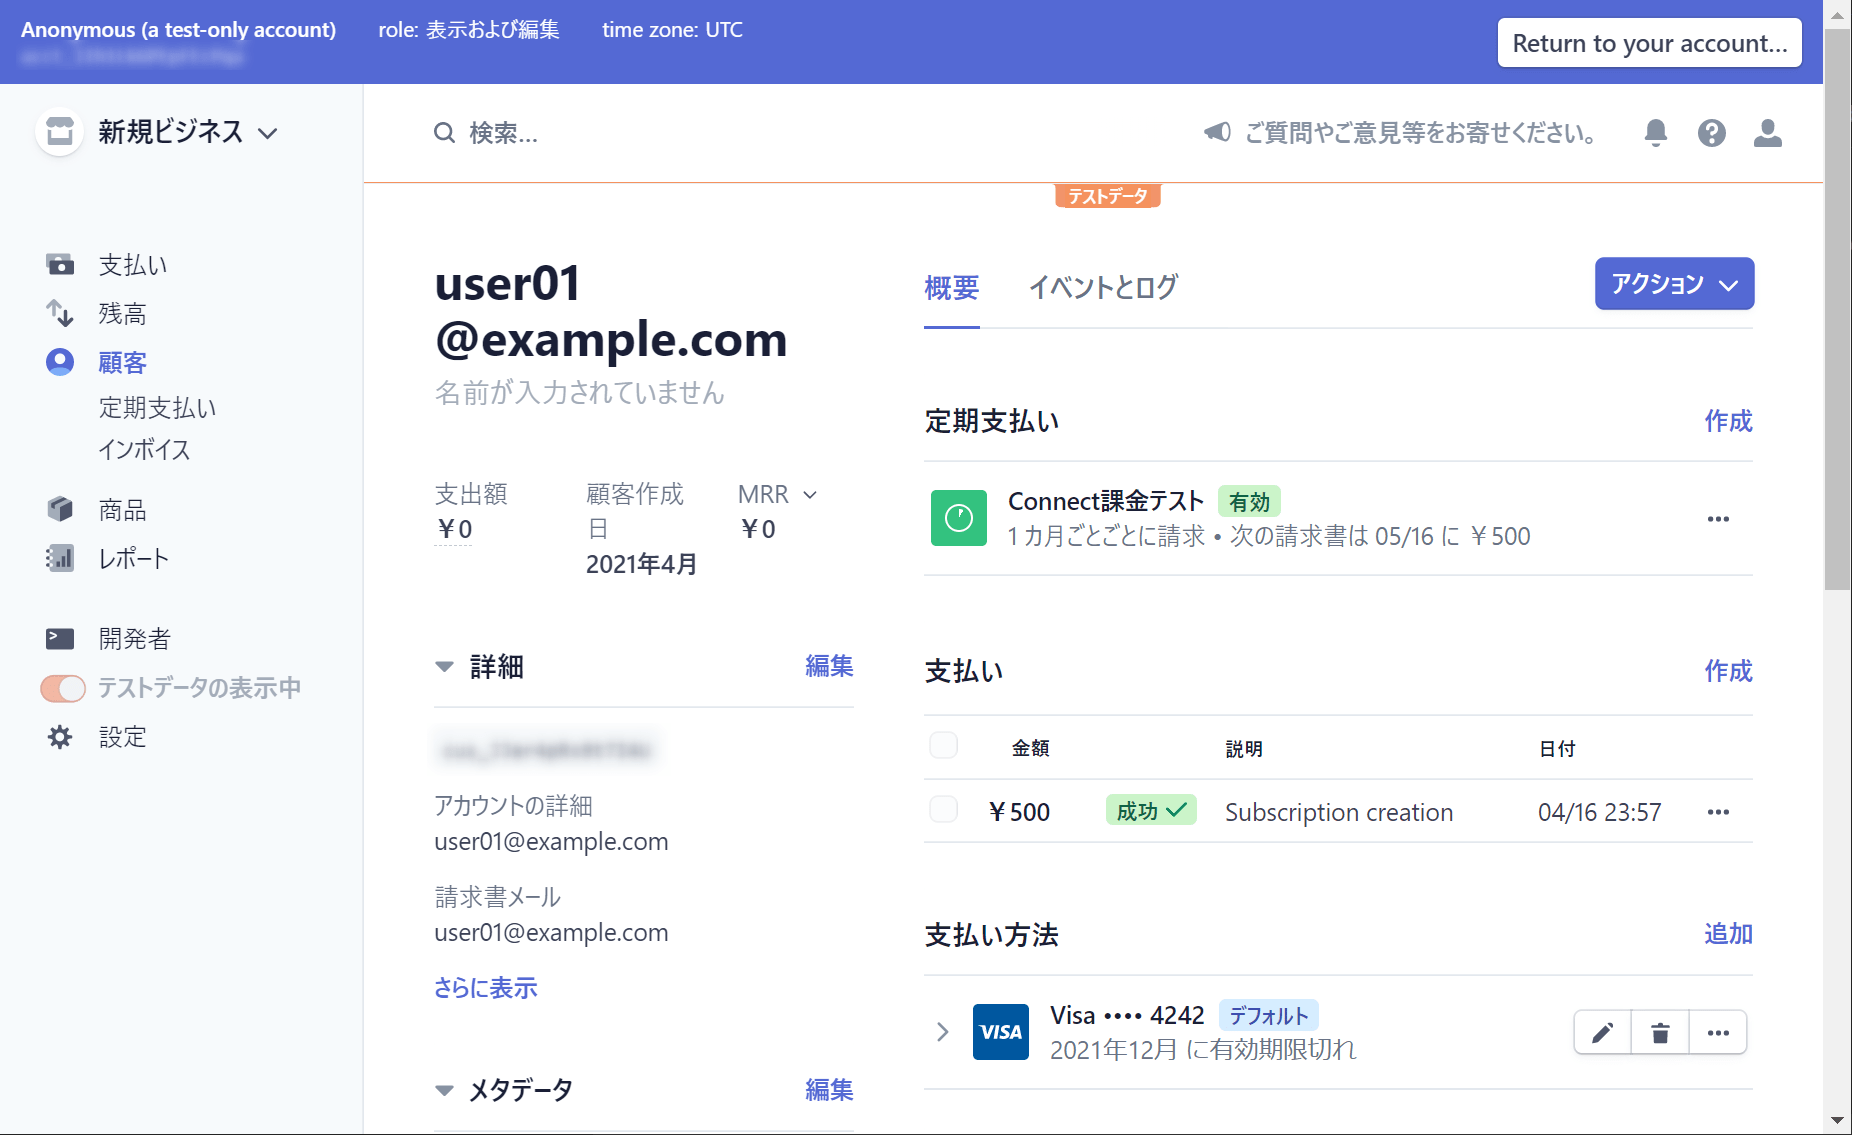
Stripeの管理画面では、次のようにプラットフォームから店舗に顧客と支払方法がクローンされていることが分かります。
Stripe Connectのダイレクト支払いでも、ユーザが支払方法の入力の手間を省くことができました。ぜひ参考にしてみてください。