はじめに
こんにちは、suzukiです。前回の記事で循環参照について触れました。今回は問題の発見に役立ったツールについて簡単に紹介していこうと思います。
今回行いたいこととしては
①開発中のテスト
②テストコードの作成
テストの準備
①画面遷移を繰り返すことによりインスタンスの増加のチェック
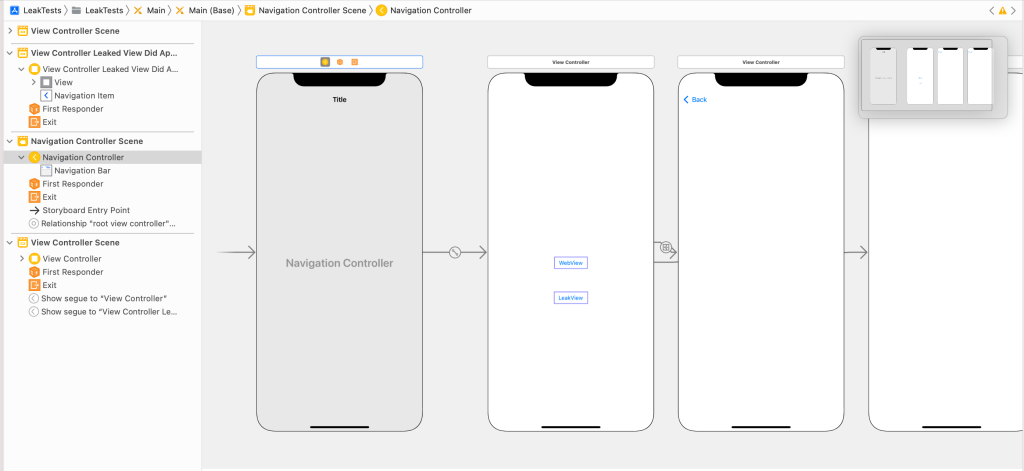
上記のテストのため、前回のコードを元に簡単Storyboardを使い画面遷移を作成します。
ボタンをタップを契機に、画面遷移をできるようにしておきます。
・前回の記事のViewController
・後述のXCTAssertNoLeakのサンプルクラス

また下記のコードのコメントアウト行をテスト実行時に切り替えます。
| 1 2 3 4 | override func viewWillDisappear(_ animated: Bool) { super.viewWillDisappear(animated) // webView.configuration.userContentController.removeScriptMessageHandler(forName: "scripthandler") } |
②テストコードの作成
こちらのライブラリを利用します。
Unitテストとしてメモリーリークの確認が可能になるライブラリです。
ターミナルでProjectName.xcodeprojのあるディレクトリに移動し
$pod init
上記のコマンドで作成されるpodFileに下記を記述
pod 'XCTAssertNoLeak'
pod install等のコマンドを行うことによって利用可能です。
またサンプルコードの下記のクラスを利用しメモリリークした際の挙動を確認します。
| 1 2 3 4 5 6 7 8 9 10 11 12 13 14 15 16 17 18 19 20 21 22 23 24 25 26 27 28 29 30 31 32 | class ViewControllerLeakedViewDidAppear: UIViewController { class Button: UIButton { var handler: (() -> ())? { didSet { addTarget(self, action: #selector(handle(_:)), for: .touchUpInside) } } @objc func handle(_ sender: Any) { handler?() } } class Logic { var updateTitle: ((String) -> ())? func buttonTitle(_ f: @escaping (String) -> ()) { self.updateTitle = f } func tapped() { } } lazy var button = Button() lazy var logic = Logic() override func viewDidAppear(_ animated: Bool) { super.viewDidAppear(animated) view.addSubview(button) logic.buttonTitle { [button] in button.setTitle($0, for: .normal) } button.handler = logic.tapped } } |
開発中のテスト
今回はMemoryGraph機能を使っていきます。
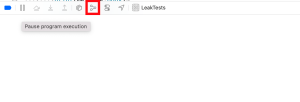
使い方は簡単で実機やエミュレータでRunしている最中に下記のボタンをタップすることで開けます。

この機能では、プロジェクトが利用しているメモリの内容が表示でき
・不自然なインスタンス数になっているオブジェクトの確認
・オブジェクトのインスタンスを保持しているクラスの確認
などが可能です。
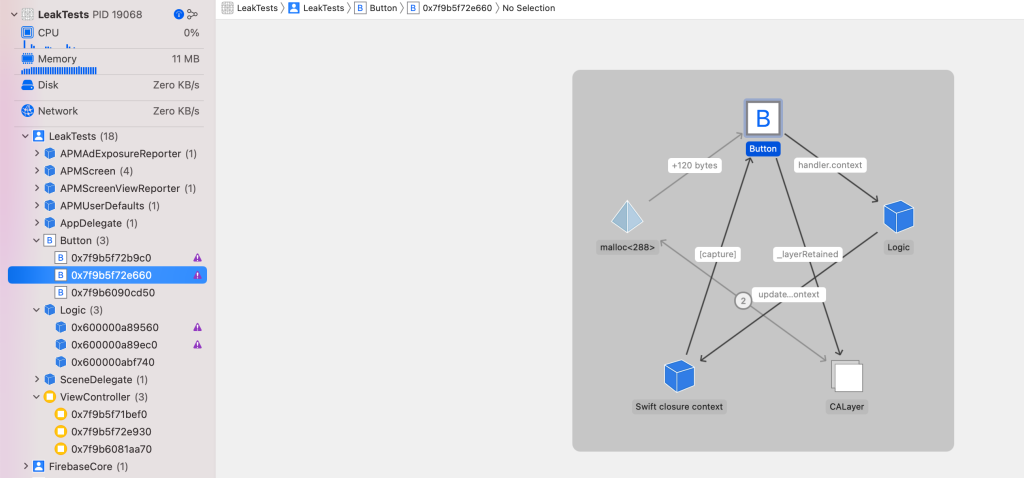
スクショの画像は実際に3回ずつ画面遷移した際のMemoryGraphです。

・ViewControllerクラスが3つ
・サンプルコードのButtonとLogicが3つ
存在していることが確認できるかと思います。また一部のインスタンスには警告マークが出ています。
警告マークのみをソートすることなども可能です。
テストコードの作成
ライブラリを利用することにより、XCTestをでLeakのチェックができるようになってます。
遷移っぽいテストも可能のようです。
| 1 2 3 4 5 6 7 8 9 10 11 12 13 14 15 16 17 18 19 20 21 | func testLeakTest() throws{ XCTAssertNoLeak { context in let rootViewController = UIApplication.shared.keyWindow!.rootViewController! let webViewController = ViewController() let leakViewController = ViewControllerLeakedViewDidAppear() rootViewController.present(webViewController, animated: true, completion: { context.traverse(webViewController) webViewController.present(leakViewController, animated: true) { context.traverse(leakViewController) leakViewController.dismiss(animated: true, completion: { webViewController.dismiss(animated: true, completion: { rootViewController.dismiss(animated: true, completion: { context.completion() }) }) }) } }) } } |
実行すると下記のようなログとスクショが見れます。
Writing analzed variants.
/Users/macbook007/blog/LeakTests/LeakTestsTests/LeakTestsTests.swift:44: error: -[LeakTestsTests.LeakTestsTests testLeakTest] : failed – 1 object occured memory leak.
– self
/Users/macbook007/blog/LeakTests/LeakTestsTests/LeakTestsTests.swift:46: error: -[LeakTestsTests.LeakTestsTests testLeakTest] : failed – 2 object occured memory leak.
– self.button
– self.logic
Test Case ‘-[LeakTestsTests.LeakTestsTests testLeakTest]’ failed (8.396 seconds).
Test Suite ‘LeakTestsTests’ failed at 2022-05-02 04:25:28.406.
Executed 1 test, with 2 failures (0 unexpected) in 8.396 (8.397) seconds
Test Suite ‘LeakTestsTests.xctest’ failed at 2022-05-02 04:25:28.407.
Executed 1 test, with 2 failures (0 unexpected) in 8.396 (8.398) seconds
Test Suite ‘Selected tests’ failed at 2022-05-02 04:25:28.408.
Executed 1 test, with 2 failures (0 unexpected) in 8.396 (8.400) seconds
さいごに
両方とものツールを利用し、起きないようにしていきたいですね。
問題が起きてしまった場合の一時解析はMemoryGraphが便利かなと思います。


![[改訂新版]Swift実践入門 ── 直感的な文法と安全性を兼ね備えた言語 WEB+DB PRESS plus](https://images-fe.ssl-images-amazon.com/images/I/51iVtfFPV1L._SL160_.jpg)

![[改訂新版]Swiftポケットリファレンス (POCKET REFERENCE)](https://images-fe.ssl-images-amazon.com/images/I/51L6-N7qRyL._SL160_.jpg)

