はじめに
Flutterでボタンなどを設置するのはとても簡単ですが、タップした時に展開するようなアニメーションをつけたいと思い今回は記事にしました。
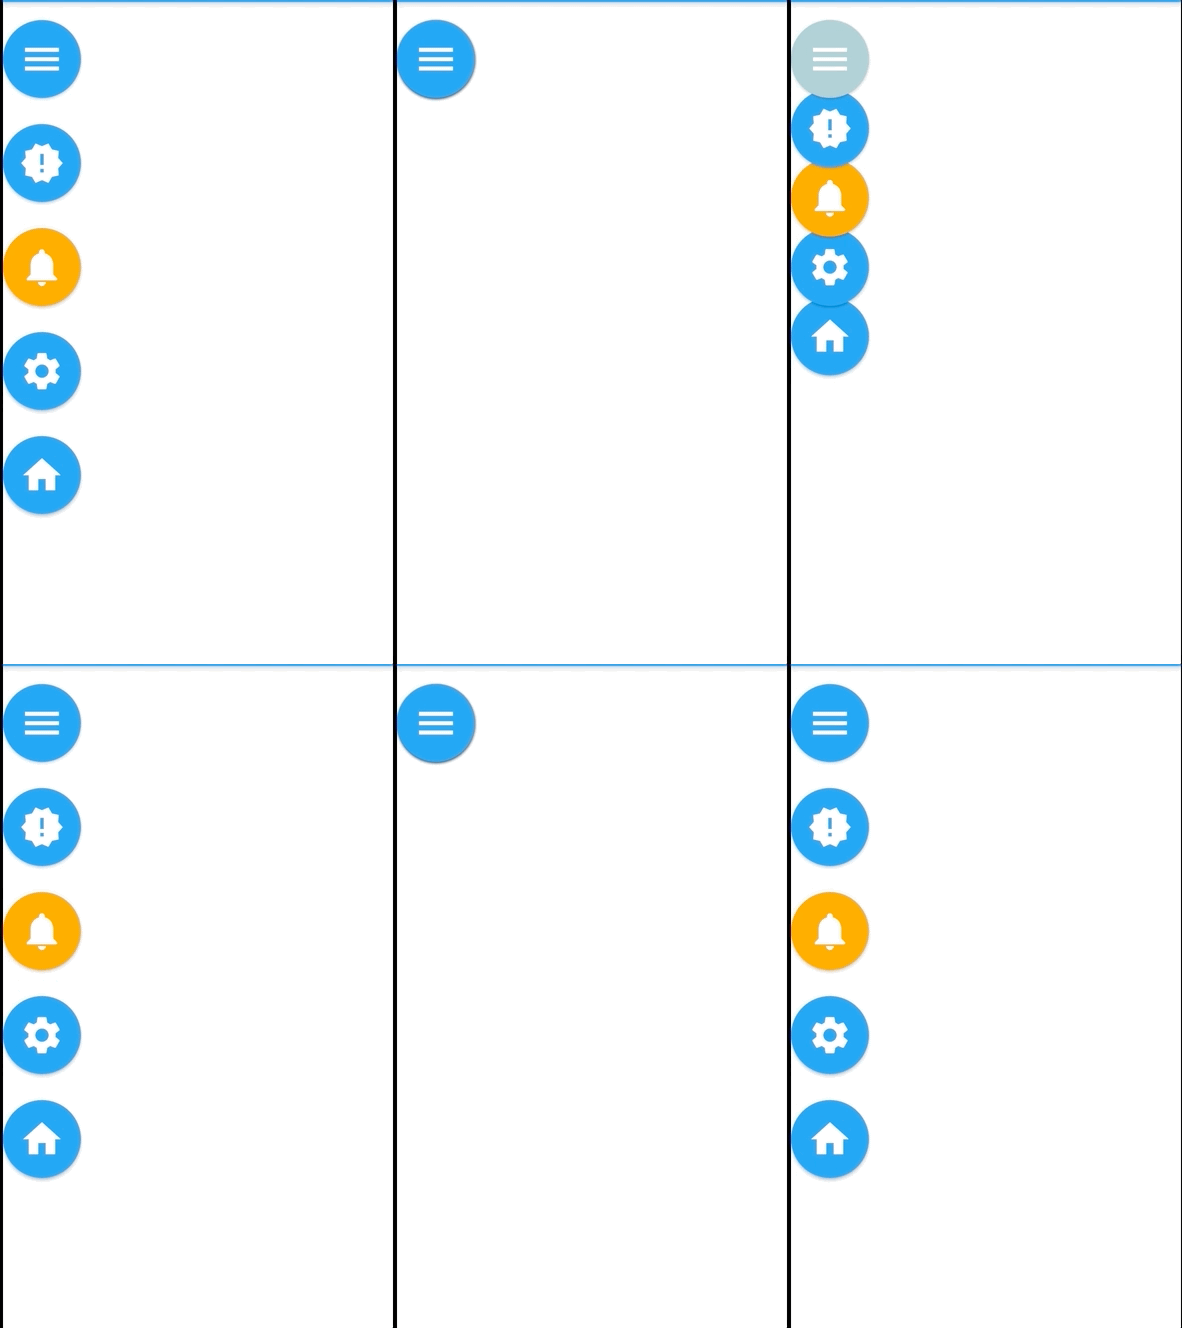
完成イメージは以下の様な形です。
Flowウィジェット
今回Flowウィジェットを使用し実装したいと思います。Flowウィジェットは以下の様にして使用します。
| 1 2 3 4 5 6 7 | Flow( delegate: MyFlowDelegate(), children: [ Icon(Icons.add), Icon(Icons.mail), ], ), |
delegateにはFlowDelegateを継承したクラス、childrenには他のウィジェット同様に子となるウィジェットを配置します。FlowDelegateを継承したクラスMyFlowDelegateを作成すると以下のようになります。
| 1 2 3 4 5 6 7 8 9 10 11 12 | class MyFlowDelegate extends FlowDelegate { @override void paintChildren(FlowPaintingContext context) { // TODO: implement paintChildren } @override bool shouldRepaint(covariant FlowDelegate oldDelegate) { // TODO: implement shouldRepaint throw UnimplementedError(); } } |
paintChildrenではcontext.paintChildを使用します。第一引数には子ウィジェットのindexを指定し、第二引数で位置の調整を行います。
| 1 2 | void paintChildren(FlowPaintingContext context) { context.paintChild(0 ,transform: Matrix4.identity()); |
なので、以下の様に設定すると相対的に位置を設定し、今回作成したいボタンの展開など、同じ動きのアニメーションを複数のウィジェットに指定することができます。
| 1 2 3 4 5 6 7 8 9 10 11 12 13 | void paintChildren(FlowPaintingContext context) { for (int i = 0; i < context.childCount; ++i) { final offset = i * 50.0; context.paintChild( i, transform: Matrix4.translationValues( -offset, -offset, 0, ), ); } } |
Animation
Flutterのアニメーションの基本となるクラスです。現在の値とアニメーションの状態(終了したかアニメーション中かなど)だけを持ちます。Listenableを継承しているので値の変更を監視することはできますが、このクラスは値を保持するだけなので、 時間経過に合わせて値を変更したり外から値を変更するためにはAnimationControllerを使う必要があります。
AnimationController
自分の値を動的に変更できるAnimationのサブクラスです。外から現在の値を渡す方法と、 指定されたDurationで自動的にアニメーションを動かす方法の二種類でアニメーションを管理することができます。
自動でアニメーションする場合はforwardで0.0~1.0で値が変化し、reverseで1.0~0.0で値が変化します。今回のサンプルでは以下の様に実装しています。
| 1 2 3 4 5 6 | AnimationController menuAnimation; menuAnimation = AnimationController( duration: const Duration(milliseconds: 250), vsync: this, ); |
vsyncはTickerProviderです、AnimationControllerを保持しているStateクラスにSingleTickerProviderStateMixinをmixinすると、 そのStateクラスがTickerProviderになるので、AnimationControllerにはthisを渡すだけで済みます。
| 1 2 3 4 5 6 7 8 9 10 11 12 13 | class _FlowMenuState extends State<FlowMenu> with SingleTickerProviderStateMixin { AnimationController menuAnimation; @override void initState() { super.initState(); menuAnimation = AnimationController( duration: const Duration(milliseconds: 250), vsync: this, ); } } |
これであとはボタンタップ時にAnimationの状態を確認して、forwardかreverseを渡してあげます。
| 1 2 3 4 5 6 | onPressed: () { _updateMenu(icon); menuAnimation.status == AnimationStatus.completed ? menuAnimation.reverse() : menuAnimation.forward(); }, |
実装
それではFlowウィジェットを使用したサンプルを作成します。コードは以下になります。
| 1 2 3 4 5 6 7 8 9 10 11 12 13 14 15 16 17 18 19 20 21 22 23 24 25 26 27 28 29 30 31 32 33 34 35 36 37 38 39 40 41 42 43 44 45 46 47 48 49 50 51 52 53 54 55 56 57 58 59 60 61 62 63 64 65 66 67 68 69 70 71 72 73 74 75 76 77 78 79 80 81 82 83 84 85 86 87 88 89 90 91 92 93 94 95 96 97 98 99 100 101 102 103 104 105 106 107 108 109 110 111 112 | import 'package:flutter/material.dart'; void main() => runApp(const FlowApp()); class FlowApp extends StatelessWidget { const FlowApp({Key key}) : super(key: key); @override Widget build(BuildContext context) { return MaterialApp( home: Scaffold( appBar: AppBar( title: const Text('Flow Example'), ), body: const FlowMenu(), ), ); } } class FlowMenu extends StatefulWidget { const FlowMenu({Key key}) : super(key: key); @override State<FlowMenu> createState() => _FlowMenuState(); } class _FlowMenuState extends State<FlowMenu> with SingleTickerProviderStateMixin { AnimationController menuAnimation; IconData lastTapped = Icons.notifications; final List<IconData> menuItems = <IconData>[ Icons.menu, Icons.new_releases, Icons.notifications, Icons.settings, Icons.home, ]; void _updateMenu(IconData icon) { if (icon != Icons.menu) { setState(() => lastTapped = icon); } } @override void initState() { super.initState(); menuAnimation = AnimationController( duration: const Duration(milliseconds: 250), vsync: this, ); } Widget flowMenuItem(IconData icon) { final double buttonDiameter = MediaQuery.of(context).size.width / menuItems.length; return Padding( padding: const EdgeInsets.symmetric(vertical: 8.0), child: RawMaterialButton( fillColor: lastTapped == icon ? Colors.amber[700] : Colors.blue, splashColor: Colors.amber[100], shape: const CircleBorder(), constraints: BoxConstraints.tight(Size(buttonDiameter, buttonDiameter)), onPressed: () { _updateMenu(icon); menuAnimation.status == AnimationStatus.completed ? menuAnimation.reverse() : menuAnimation.forward(); }, child: Icon( icon, color: Colors.white, size: 45.0, ), ), ); } @override Widget build(BuildContext context) { return Flow( delegate: FlowMenuDelegate(menuAnimation: menuAnimation), children: menuItems.map<Widget>((IconData icon) => flowMenuItem(icon)).toList(), ); } } class FlowMenuDelegate extends FlowDelegate { FlowMenuDelegate({@required this.menuAnimation}) : super(repaint: menuAnimation); final Animation<double> menuAnimation; @override bool shouldRepaint(FlowMenuDelegate oldDelegate) { return menuAnimation != oldDelegate.menuAnimation; } @override void paintChildren(FlowPaintingContext context) { for (int i = context.childCount - 1; i >= 0; i--) { print(menuAnimation.value); double dx = (context.getChildSize(i).height + 10) * i; context.paintChild( i, transform: Matrix4.translationValues(0, dx * menuAnimation.value + 10, 0), ); } } } |
これでボタンタップで展開する以下の様なアニメーションが実装できました。

さいごに
FABをタップした時に展開するアニメーションなど、それ以外にも相対的に位置を判定して、同じ動きをするアニメーションが作成できるので、要所要所で使っていきたいです。


