はじめに
9月18日に待望の Vue.js 3.0 がリリースされました。そこで、今回は以前の記事でも紹介した Teleport について、実際に動かしてみましたので、紹介します。
Vue.js 3.0のプロジェクト作成方法
Vue.js 3.0 でも、 Vue CLI を使ったプロジェクトの作成方法は変わっていません。ただし、 Vue.js 3.0 のプロジェクトを作成するには、 Vue CLI v4.5 以上が必要になります。
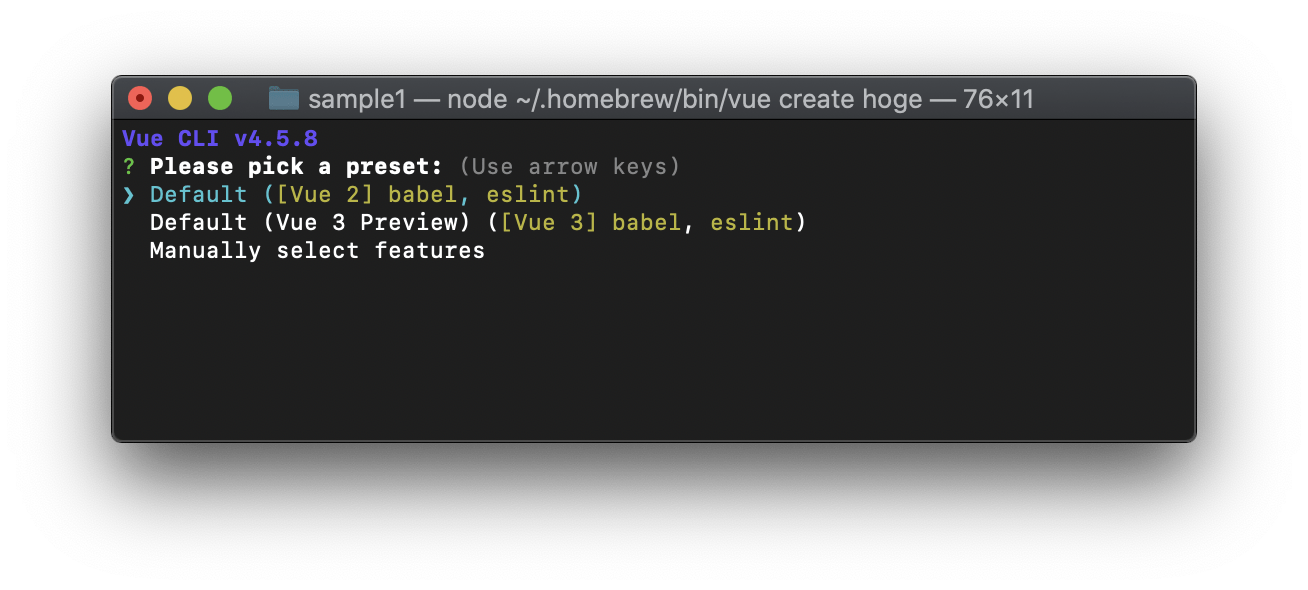
今回から、新たに
Default (Vue 3 Preview) ([Vue 3] babel, eslint)
という選択肢が増えました。こちらを選択して、サンプルプロジェクトを作成します。
Preview とついてある通り、この設定はプレビュー用とのことです。
This version adds first-class Vue 3 support (for preview). You no longer need
vue-cli-plugin-vue-nextto serve and build Vue 3 projects. Users of the plugin can safely remove it from the projects.
https://github.com/vuejs/vue-cli/releases/tag/v4.5.0
Teleportとは
以前の記事で紹介しましたとおり、
<Teleport>
タグで囲った部分を、コンポーネントが属するDOMツリーとは別の場所に、移動させることができます。これにより、主にCSS関連で恩恵を受けることができます。一般的には、モーダルなどを作る際に、利用されるのではないでしょうか。
基本形
一番シンプルな実装を紹介します。画面にモーダルを表示するボタンを配置し、クリックすると、全画面モーダルを表示します。
コード
Index.html は、 Vue CLI で生成した状態から、変更はありません。
| 1 2 3 4 5 6 7 8 9 10 11 12 13 14 15 16 17 | <!DOCTYPE html> <html lang="en"> <head> <meta charset="utf-8"> <meta http-equiv="X-UA-Compatible" content="IE=edge"> <meta name="viewport" content="width=device-width,initial-scale=1.0"> <link rel="icon" href="<%= BASE_URL %>favicon.ico"> <title><%= htmlWebpackPlugin.options.title %></title> </head> <body> <noscript> <strong>We're sorry but <%= htmlWebpackPlugin.options.title %> doesn't work properly without JavaScript enabled. Please enable it to continue.</strong> </noscript> <div id="app"></div> <!-- built files will be auto injected --> </body> </html> |
App.vue は以下の通りです。 TeleportSample1 が、実際に Teleport する部分を含んだコンポーネントです。
| 1 2 3 4 5 6 7 8 9 10 11 12 13 14 15 16 17 18 19 20 21 22 23 24 25 26 27 28 | <template> <div> <img alt="Vue logo" src="./assets/logo.png"> </div> <TeleportSample1 msg="モーダルの内容" /> </template> <script> import TeleportSample1 from "./components/TeleportSample1"; export default { name: 'App', components: { TeleportSample1 } } </script> <style> #app { font-family: Avenir, Helvetica, Arial, sans-serif; -webkit-font-smoothing: antialiased; -moz-osx-font-smoothing: grayscale; text-align: center; color: #2c3e50; margin-top: 60px; } </style> |
TeleportSample1.vue は以下の通りです。以前の記事でも紹介しましたとおり、 to で指定した先に移動するので、このサンプルでは body の直下にモーダルが移動します。
| 1 2 3 4 5 6 7 8 9 10 11 12 13 14 15 16 17 18 19 20 21 22 23 24 25 26 27 28 29 30 31 32 33 34 35 36 37 38 39 40 41 42 43 44 45 46 47 48 49 50 51 52 53 54 | <template> <button @click="modalOpen = true"> モーダルを開く </button> <teleport to="body"> <div v-if="modalOpen" class="modal"> <div> モーダルの中身<br> {{ msg }} <button @click="modalOpen = false"> 閉じる </button> </div> </div> </teleport> </template> <script> export default { name: "TeleportSample1", props: { msg: String }, data() { return { modalOpen: false } } } </script> <style scoped> .modal { position: absolute; top: 0; right: 0; bottom: 0; left: 0; background-color: rgba(0,0,0,.5); display: flex; flex-direction: column; align-items: center; justify-content: center; } .modal div { display: flex; flex-direction: column; align-items: center; justify-content: center; background-color: white; width: 300px; height: 300px; padding: 5px; } </style> |
画面
実際の画面はこちらです。
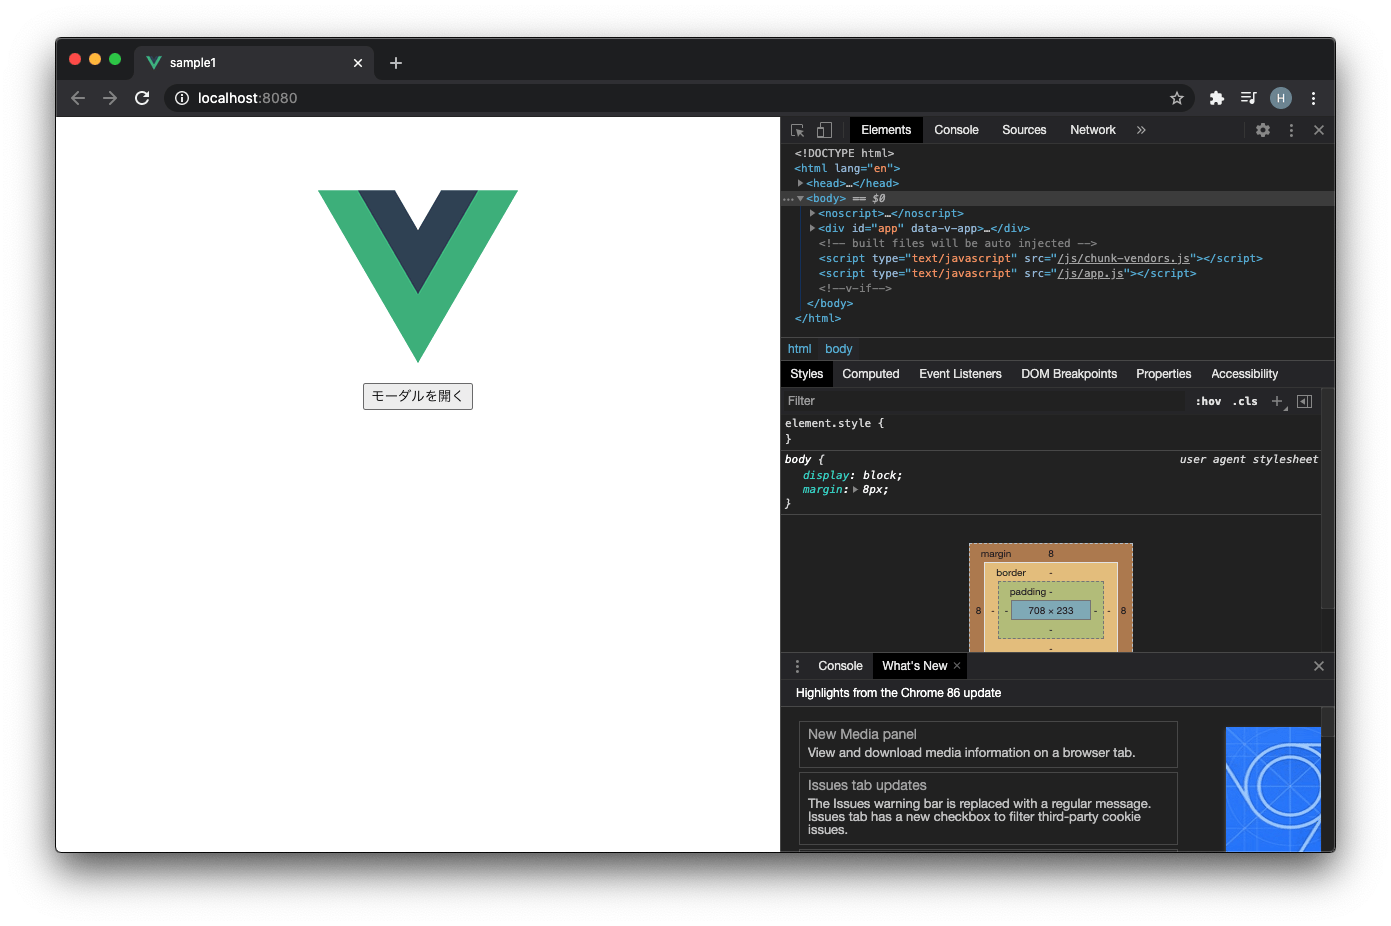
「モーダルを開く」ボタンをクリックすると、
<body>
タグの中に
<div>
タグが追加されているのがわかります。

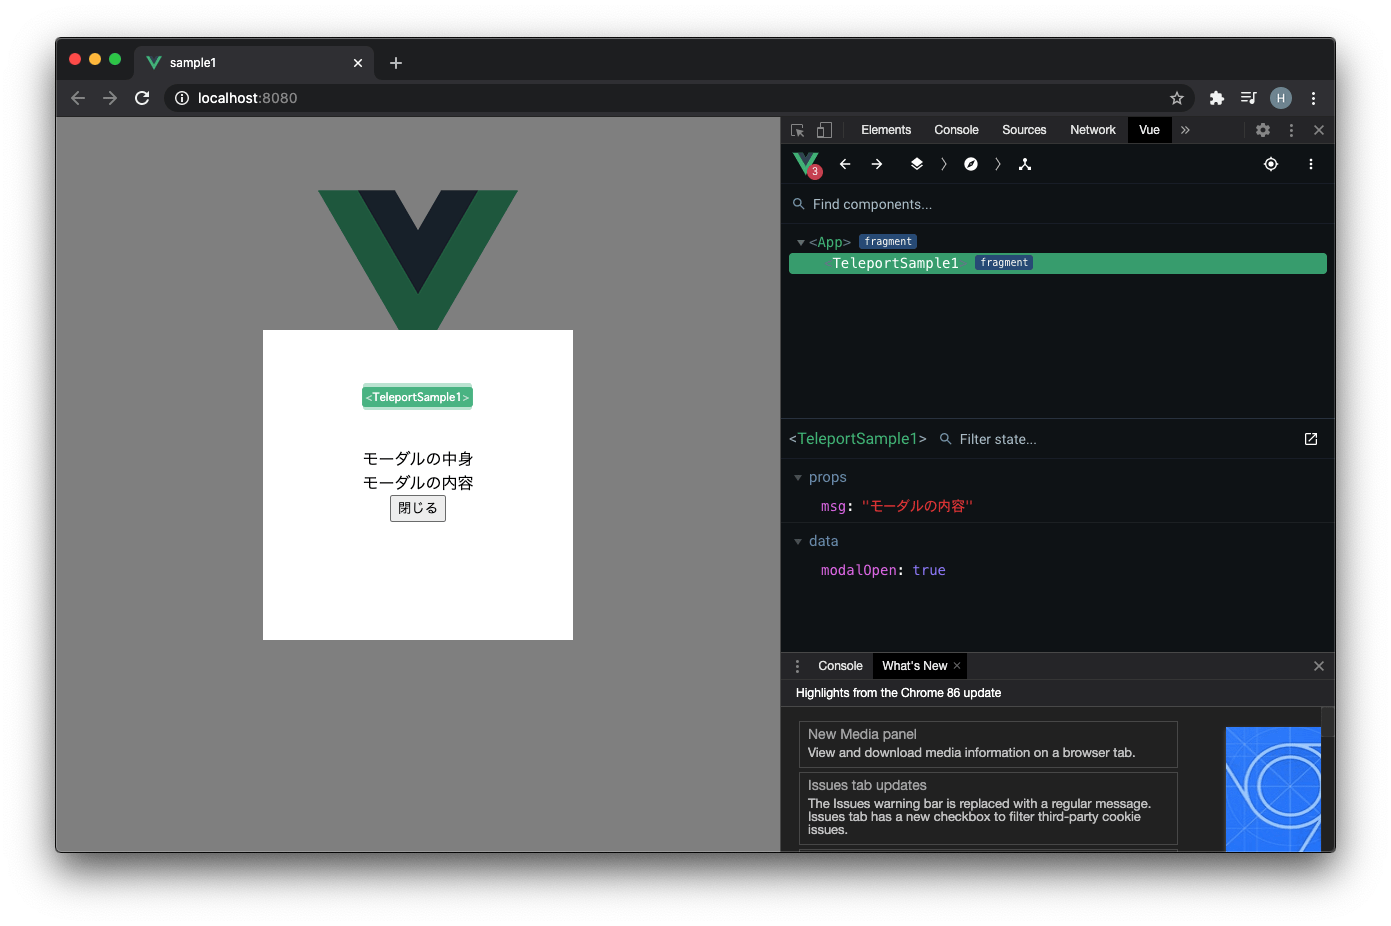
devtools で確認すると、 TeleportSample1 は App の子のコンポーネントであることがわかります。
別のコンポーネントの入れ子にする場合
次に、別のコンポーネントの入れ子にする場合について、紹介します。親のコンポーネント(カード)の中に、子のコンポーネント(フォーム)がある例で、コードをみていきます。
コード
App.vue は以下の通りです。 TeleportSample2Parent が、実際に Teleport する部分を含んだコンポーネントです。
| 1 2 3 4 5 6 7 8 9 10 11 12 13 14 15 16 17 18 19 20 21 22 23 24 25 26 27 28 | <template> <div> <img alt="Vue logo" src="./assets/logo.png"> </div> <TeleportSample2Parent /> </template> <script> import TeleportSample2Parent from "./components/TeleportSample2Parent"; export default { name: 'App', components: { TeleportSample2Parent } } </script> <style> #app { font-family: Avenir, Helvetica, Arial, sans-serif; -webkit-font-smoothing: antialiased; -moz-osx-font-smoothing: grayscale; text-align: center; color: #2c3e50; margin-top: 60px; } </style> |
TeleportSample2Parent.vue は以下の通りです。
| 1 2 3 4 5 6 7 8 9 10 11 12 13 14 15 16 17 18 19 20 21 22 23 24 25 26 27 28 29 | <template> <teleport to="body"> <div class="container"> <TeleportSample2Child /> </div> </teleport> </template> <script> import TeleportSample2Child from "./TeleportSample2Child"; export default { name: "TeleportSample2Parent", components: { TeleportSample2Child } } </script> <style scoped> .container { width: 300px; margin: auto; padding: 10px; background: darkgray; text-align: center; color: white; } </style> |
TeleportSample2Child.vue は以下の通りです。
| 1 2 3 4 5 6 7 8 9 10 11 12 13 14 15 16 17 18 19 20 21 22 23 24 25 26 27 28 29 30 31 32 33 34 35 36 37 38 39 40 41 42 43 44 45 46 47 48 49 50 51 52 53 54 55 56 57 58 59 60 61 62 63 64 65 66 67 68 69 70 71 72 73 74 75 76 77 78 79 | <template> <form ref="form"> <div class="form-row"> <label class="form-label">name</label> <input type="text"> </div> <div class="form-row"> <label class="form-label">email</label> <input type="email"> </div> <div class="form-row"> <button type="button" @click="modalOpen = true"> 送信 </button> </div> </form> <teleport to="body"> <div v-if="modalOpen" class="modal"> <div> 本当に送信しますか? <button @click="submitForm"> はい </button> <button @click="modalOpen = false"> いいえ </button> </div> </div> </teleport> </template> <script> export default { name: "TeleportSample2Child", data() { return { modalOpen: false } }, methods: { submitForm() { this.modalOpen = false this.$refs.form.submit(); } } } </script> <style scoped> .modal { position: absolute; top: 0; right: 0; bottom: 0; left: 0; background-color: rgba(0,0,0,.5); display: flex; flex-direction: column; align-items: center; justify-content: center; } .modal div { display: flex; flex-direction: column; align-items: center; justify-content: center; background-color: white; width: 300px; height: 300px; padding: 5px; } .form-row { margin: 10px; } .form-label { margin-right: 5px; } </style> |
画面
画面は以下の通りです。

送信ボタンをクリックすると、確認モーダルが表示されます。
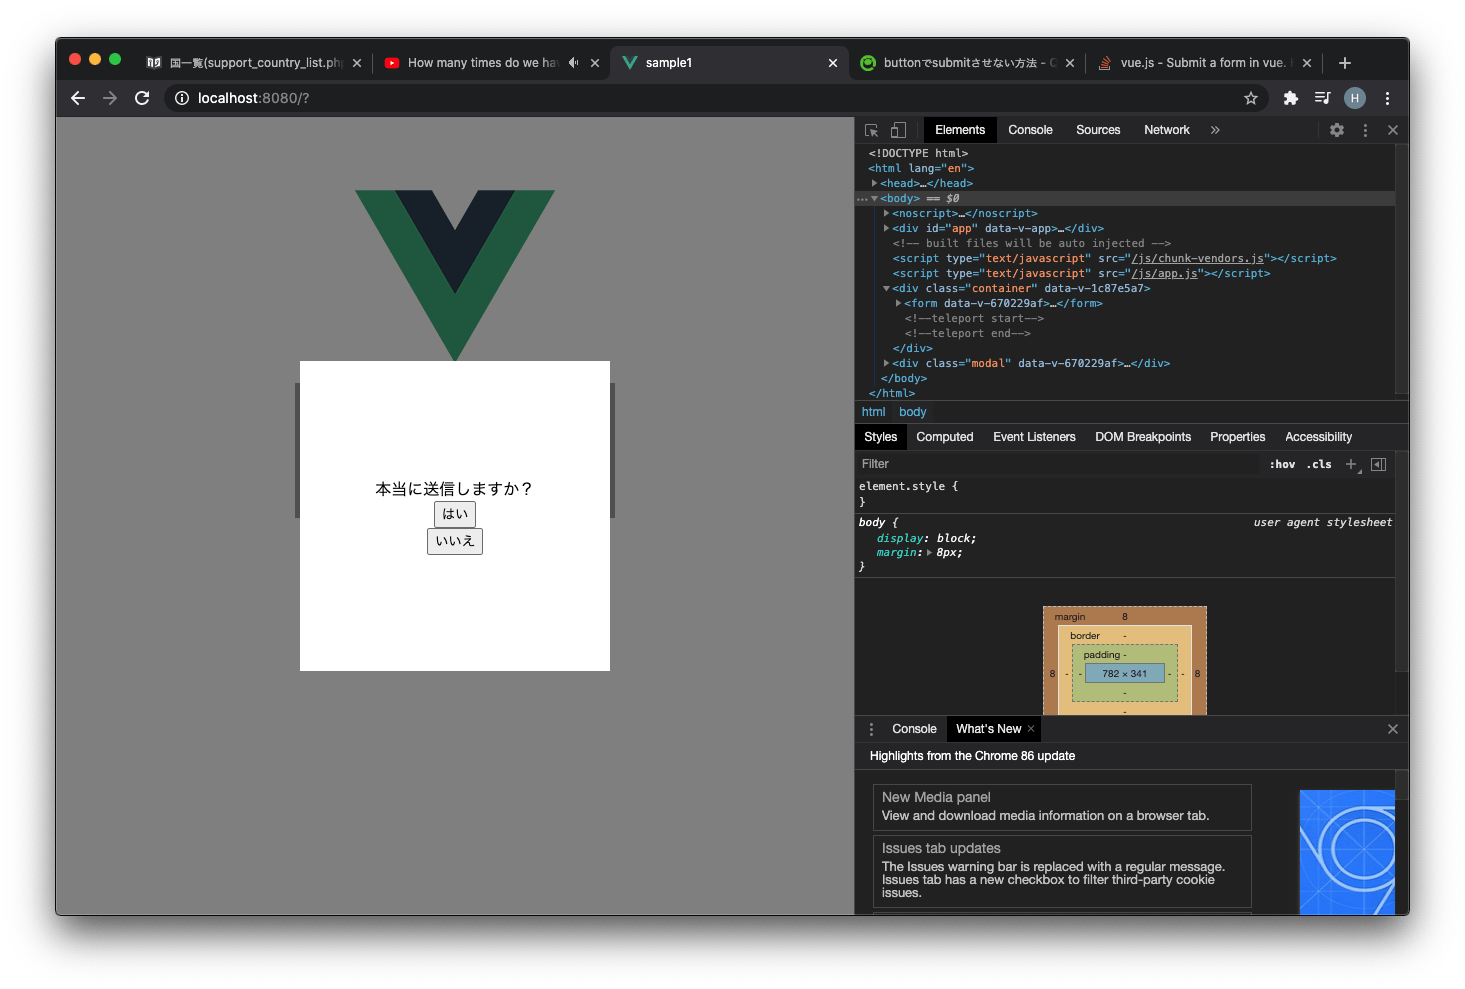
基本形でもモーダルを例にあげましたが、モーダルは入れ子になったコンポーネントの中に表示するのではなく、 body の直下のような、他のコンポーネントとは独立した所に配置される方が都合が良いです。
Teleport を使わないで同じことをしようとすると、親のコンポーネントに対して、 ネストした分 emit を繰り返す必要があり、手間がかかりますが、 Teleport を使うと、シンプルに実装することができます。
同じターゲットに複数Teleportする場合
同じターゲットに複数のコンポーネントをテレポートする場合について、紹介します。
コード
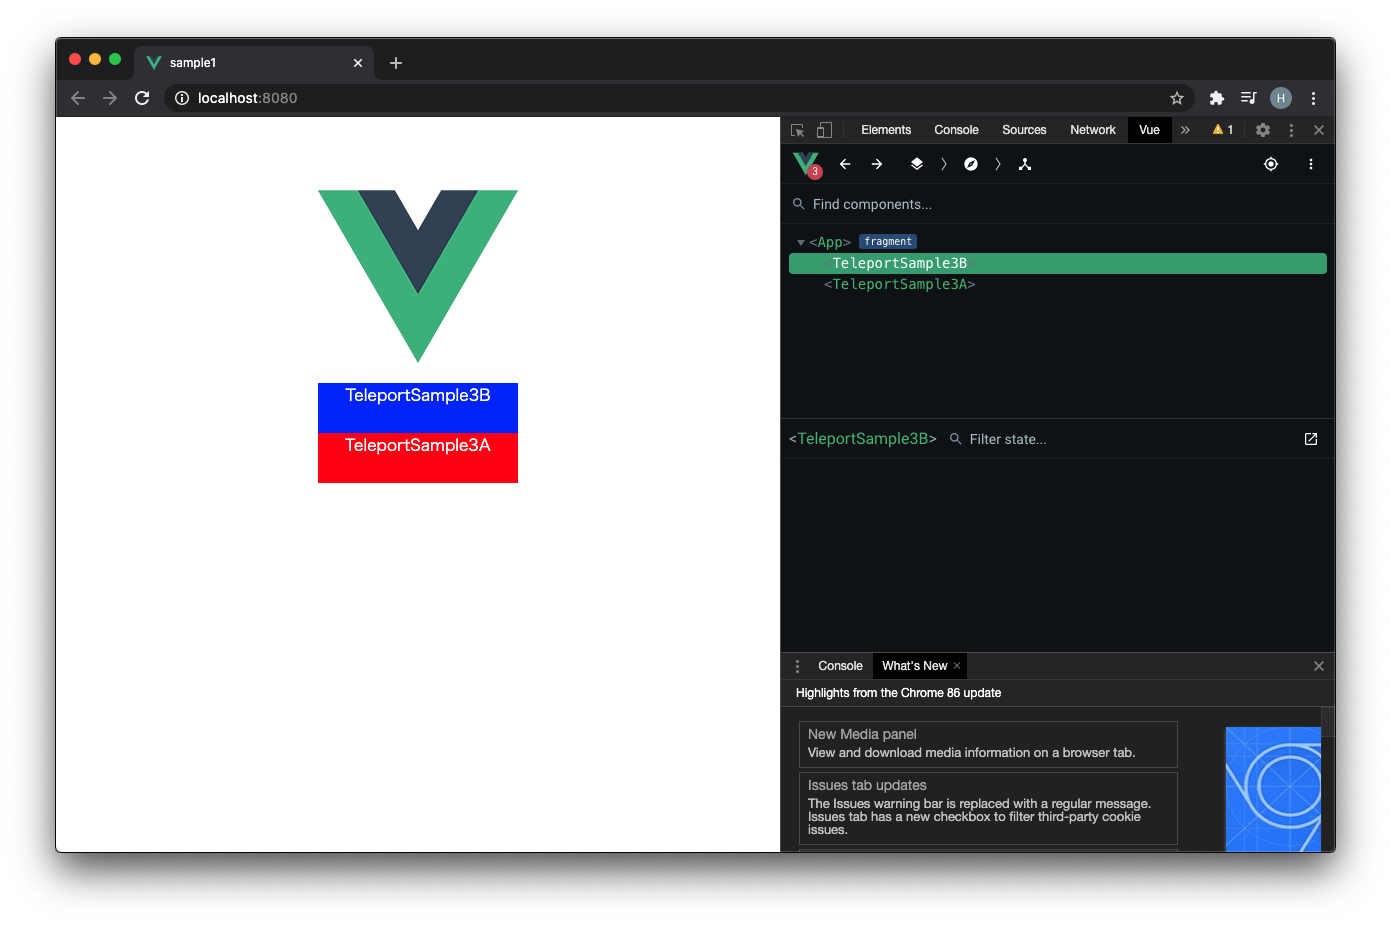
App.vue は以下の通りです。 TeleportSample3A と TeleportSample3B が、実際に Teleport する部分を含んだコンポーネントです。
| 1 2 3 4 5 6 7 8 9 10 11 12 13 14 15 16 17 18 19 20 21 22 23 24 25 26 27 28 29 30 31 | <template> <div> <img alt="Vue logo" src="./assets/logo.png"> </div> <TeleportSample3B /> <TeleportSample3A /> </template> <script> import TeleportSample3A from "./components/TeleportSample3A"; import TeleportSample3B from "./components/TeleportSample3B"; export default { name: 'App', components: { TeleportSample3B, TeleportSample3A } } </script> <style> #app { font-family: Avenir, Helvetica, Arial, sans-serif; -webkit-font-smoothing: antialiased; -moz-osx-font-smoothing: grayscale; text-align: center; color: #2c3e50; margin-top: 60px; } </style> |
TeleportSample3A.vue は以下の通りです。
| 1 2 3 4 5 6 7 8 9 10 11 12 13 14 15 16 17 18 19 20 21 22 | <template> <teleport to="body"> <p class="container">TeleportSample3A</p> </teleport> </template> <script> export default { name: "TeleportSample3A" } </script> <style scoped> .container { width: 200px; height: 50px; margin: auto; background: red; text-align: center; color: white; } </style> |
TeleportSample3B.vue は以下の通りです。
| 1 2 3 4 5 6 7 8 9 10 11 12 13 14 15 16 17 18 19 20 21 22 | <template> <teleport to="body"> <p class="container">TeleportSample3B</p> </teleport> </template> <script> export default { name: "TeleportSample3B" } </script> <style scoped> .container { width: 200px; height: 50px; margin: auto; background: blue; text-align: center; color: white; } </style> |
画面
同じターゲットに複数のコンポーネントを Teleport する場合、記載された順番に表示されます。
おまけ
正規のdevtools は Vue.js 3.0 に対応していないので、こちらの通り、ベータ版を使用しましょう。
さいごに
ついに登場した Vue.js 3.0 にて、 Teleport を実際に動かしてみました。RC版だった時は、実際のプロジェクトでは使用できませんでしが、これで心置きなく Vue.js 3.0 を使えそうです。
おすすめ書籍