はじめに
今回はiOSエンジニアなら1回はみたことがあるであろう、半モーダルを簡単に実装できて、カスタマイズ性にも優れたライブラリ FloatingPanel を使ってみたいと思います。
https://github.com/SCENEE/FloatingPanel
半モーダルって?
半モーダルは「セミモーダル」や「フローティングパネル」とも呼ばれている(呼び方は定まってないらしいです)は、既存のモーダルのように新しい ViewController を被せて表示するのですが、フルスクリーンではなく親の ViewController と共存しつつサイズを高さを変更して表現する手法です。
百聞は一見にしかずで、わかりやすいサンプルだと標準のマップアプリが想像しやすいと思います。
自前で用意することも可能なのですが、せっかく素敵なライブラリがあるので早速使ってみたいと思います。
準備
今回は Cocoapods を使用します。
Podfile にこちらを記述してください。
| 1 | pod 'FloatingPanel' |
そうしたら、以下のコマンドでビルドしてください。
| 1 | pod install |
実装
まずは、単純に ViewController を表示してみたいと思います。
早速、半モーダル用に ViewController を作成します。
| 1 2 3 4 5 6 7 8 9 10 | import UIKit class ContentViewController: UIViewController { override func viewDidLoad() { super.viewDidLoad() self.view.backgroundColor = .black } } |
この後、カスタマイズもしていきたいのでxibファイルも一緒に作成しておいてください。
では、早速この ViewController を半モーダルで表示します。
| 1 2 3 4 5 6 7 8 9 10 11 12 13 14 15 16 17 18 | import UIKit import FloatingPanel class ViewController: UIViewController, FloatingPanelControllerDelegate { var fpc: FloatingPanelController! override func viewDidLoad() { super.viewDidLoad() fpc = FloatingPanelController() fpc.delegate = self // Optional let contentVC = ContentViewController() fpc.set(contentViewController: contentVC) fpc.addPanel(toParent: self) } } |
これを実行すると以下のように表示されます。
ちなみに上記のコードだけで、このような動きができます。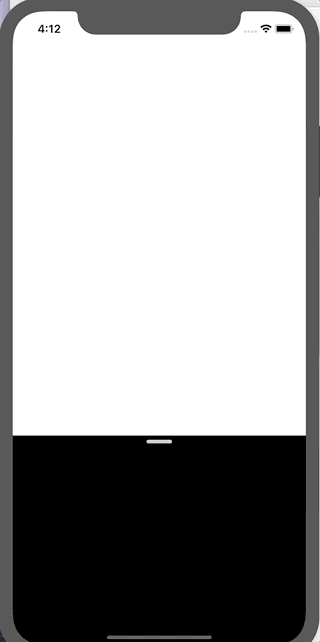
表示位置の変更
特に設定しなくとも標準で3段階の表示位置があるのですがこれらの変更も可能です。
まずは、 FloatingPanelLayout を継承した class を作成します。
| 1 2 3 4 5 6 7 8 9 10 11 12 13 14 15 | class CustomFloatingPanelLayout: FloatingPanelLayout { var initialPosition: FloatingPanelPosition { return .tip } public func insetFor(position: FloatingPanelPosition) -> CGFloat? { switch position { case .full: return 16.0 // A top inset from safe area case .half: return 216.0 // A bottom inset from the safe area case .tip: return 44.0 // A bottom inset from the safe area default: return nil // Or `case .hidden: return nil` } } } |
上記のコードでは、初期のポジションの設定と、各ボジションでの表示位置を設定しています。ポジションは3段回用意されており、各段階ごとの設定が可能です。
上記 class を反映させるには FloatingPanelControllerDelegate の delegate メソッドで返却します。
| 1 2 3 | func floatingPanel(_ vc: FloatingPanelController, layoutFor newCollection: UITraitCollection) -> FloatingPanelLayout? { return CustomFloatingPanelLayout() } |
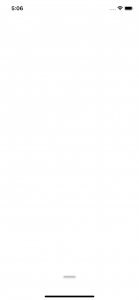
実行すると以下のように、初期位置が tip から始まります。
FloatingPanelLayout を使用して返却される FloatingPanelPosition を絞り、動きを2段回にすることもできます。
| 1 2 3 4 5 | class CustomFloatingPanelLayout: FloatingPanelLayout { public var supportedPositions: Set<FloatingPanelPosition> { return [.full, .tip] } |
supportedPositions で返却する FloatingPanelPosition を設定すると以下のような動きになります。
スクロール領域の設定
標準のマップアプリなど、半モーダル内でテーブルビューなどスクロールするパターンもあると思います。 ContentViewController にテーブルビューを追加します。
| 1 2 3 4 5 6 7 8 9 10 11 12 13 14 15 16 17 18 19 20 21 22 23 24 | import UIKit class ContentViewController: UIViewController { @IBOutlet weak var tableView: UITableView? override func viewDidLoad() { super.viewDidLoad() tableView?.dataSource = self } } extension ContentViewController: UITableViewDataSource { func tableView(_ tableView: UITableView, numberOfRowsInSection section: Int) -> Int { return 100 } func tableView(_ tableView: UITableView, cellForRowAt indexPath: IndexPath) -> UITableViewCell { let cell = UITableViewCell() cell.textLabel?.text = "\(indexPath.row)行目" return cell } } |
FloatingPanelController にスクロールの制御を入れます。
| 1 | fpc.track(scrollView: contentVC.tableView) |
こうすることで supportedPositions が full のときにスクロールするようになり、 tip の状態などの時にテーブルビューをスワイプしてもスクロールが発生せず、半モーダルの操作が行われます。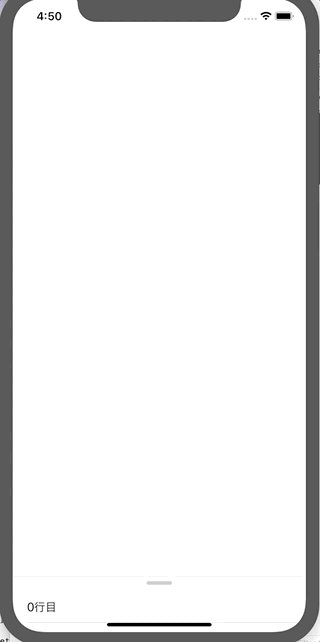
レイアウトの変更
レイアウトを作成するにあたって角丸と透過の2つは抑えておきたいと思ったので紹介します。
まずは角丸です。
| 1 | fpc.surfaceView.cornerRadius = 9.0 |
 続けて透過です。
| 1 | fpc.surfaceView.backgroundColor = .clear |
 なぜ透過にしたかったと言いますと、透過にすることで UIVisualEffectView を使ったブラーが可能になります。
| 1 2 3 4 5 6 7 8 9 10 11 | class ContentViewController: UIViewController { override func viewDidLoad() { super.viewDidLoad() let blurEffect = UIBlurEffect(style: .dark) let visualEffectView = UIVisualEffectView(effect: blurEffect) visualEffectView.frame = self.view.frame self.view.addSubview(visualEffectView) } } |
ブラーがわかりやすいように ViewController に適当なビューを配置して実行するとこんな感じになります。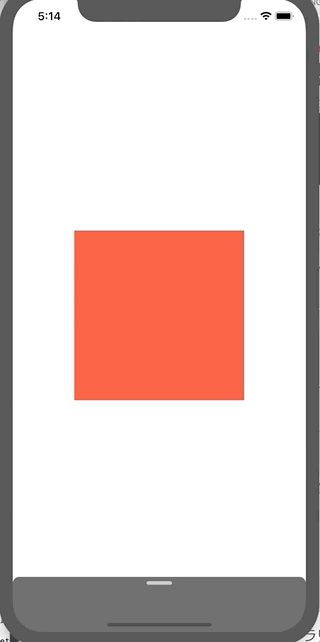
さいごに
このような素敵なライブラリを作成していただき、作成者様には大変感謝しております。
おすすめ書籍
![[改訂新版]Swift実践入門 ── 直感的な文法と安全性を兼ね備えた言語 WEB+DB PRESS plus](https://images-fe.ssl-images-amazon.com/images/I/51iVtfFPV1L._SL160_.jpg)

![[改訂新版]Swiftポケットリファレンス (POCKET REFERENCE)](https://images-fe.ssl-images-amazon.com/images/I/51L6-N7qRyL._SL160_.jpg)