はじめに
Stripe Connectとは、マーケットプレイス型のサイトを運営するために、複数の売り手が決済できるようにするサービスです。今回はダイレクト支払いを使用して、店舗に支払う方法を紹介します。
事前準備
Stripe Connectのサンプルを実装する上で、次のテーブルを用意します。
店舗用テーブル:
店舗のStripeアカウントIDを入れておくためのカラムを追加しています。
2021_02_20_000000_create_shops_table.php
| 1 2 3 4 5 6 7 8 9 10 11 12 13 14 15 16 17 18 19 20 21 22 23 24 25 26 27 28 29 30 31 32 33 34 35 36 37 | <?php use Illuminate\Database\Migrations\Migration; use Illuminate\Database\Schema\Blueprint; use Illuminate\Support\Facades\Schema; class CreateshopsTable extends Migration { /** * Run the migrations. * * @return void */ public function up() { Schema::create('shops', function (Blueprint $table) { $table->id(); $table->string('name'); $table->string('email')->unique(); $table->timestamp('email_verified_at')->nullable(); $table->string('password'); $table->rememberToken(); $table->string('stripe_account_id')->nullable()->comment('店舗のStripeアカウント'); $table->timestamps(); }); } /** * Reverse the migrations. * * @return void */ public function down() { Schema::dropIfExists('shops'); } } |
商品テーブル:
店舗が販売する商品テーブルです。
2021_02_21_164202_create_products_table.php
| 1 2 3 4 5 6 7 8 9 10 11 12 13 14 15 16 17 18 19 20 21 22 23 24 25 26 27 28 29 30 31 32 33 34 | <?php use Illuminate\Database\Migrations\Migration; use Illuminate\Database\Schema\Blueprint; use Illuminate\Support\Facades\Schema; class CreateProductsTable extends Migration { /** * Run the migrations. * * @return void */ public function up() { Schema::create('products', function (Blueprint $table) { $table->id(); $table->string('name')->comment('商品名'); $table->integer('price')->comment('価格'); $table->integer('shop_id')->comment('店舗ID'); $table->timestamps(); }); } /** * Reverse the migrations. * * @return void */ public function down() { Schema::dropIfExists('products'); } } |
StripeConnectの導入
今回はPHP・Laravelで実装していきます。
stripeパッケージの導入
composerで必要なパッケージをインストールしていきます。
| 1 | $ composer instal stripe/stripe-php |
envの実装
あらかじめ、.envにStripeに必要なキーを設定しておきます。Stripe管理画面の[開発者]>[APIキー]で確認できます。
| 1 2 | STRIPE_SECRET="sk_test_hogehoge" STRIPE_PUBLIC="pk_test_hogehoge" |
店舗アカウントの登録
店舗アカウントを登録する流れを説明します。店舗は自分のStripeアカウントをOauth認証させて、サイトにStripeアカウントIDを登録します。
Stripe Connectの設定
Stripeの管理画面から、[設定]>[Connect]を開きます。
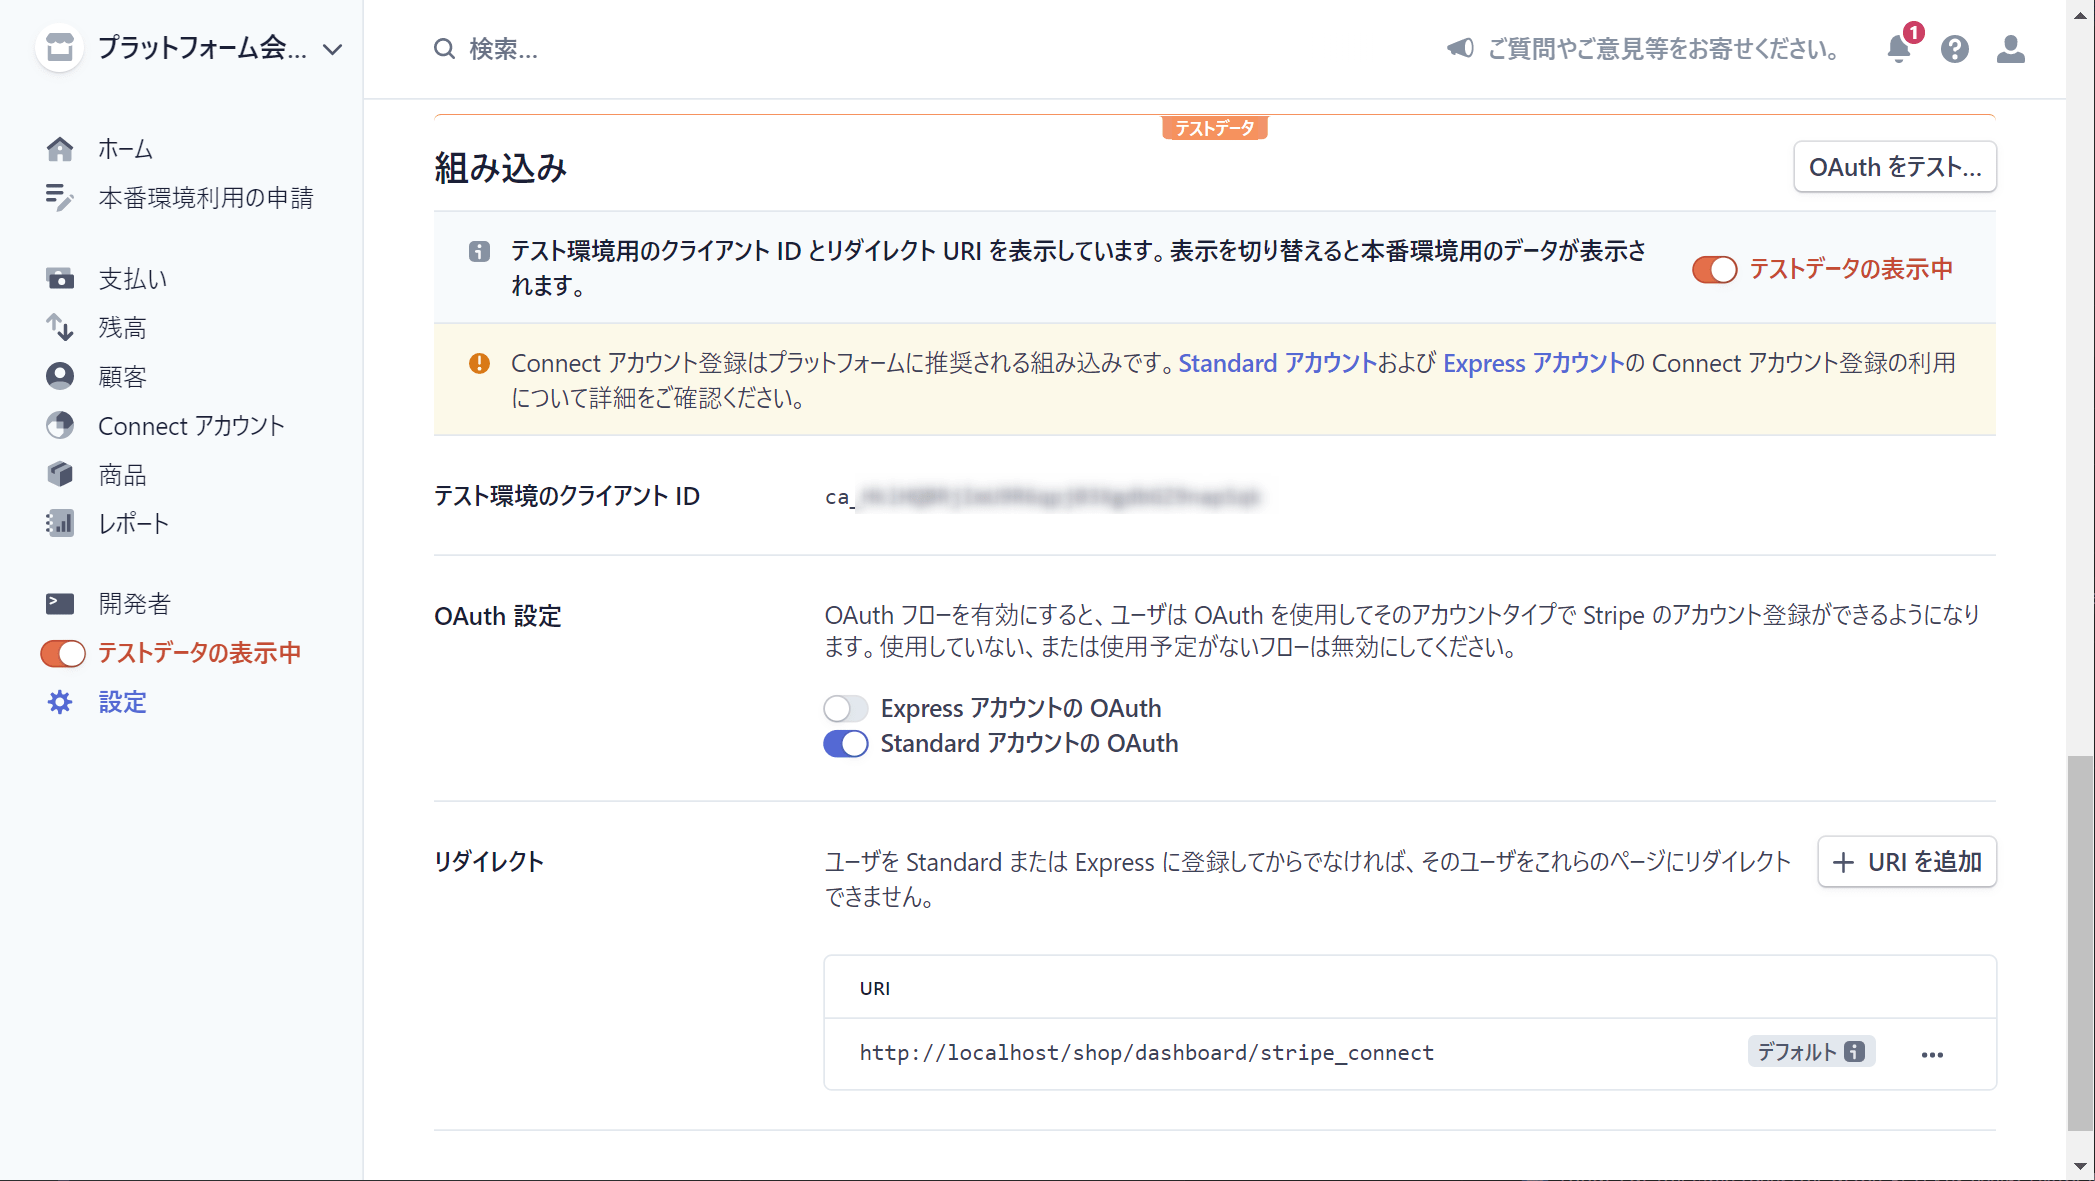 このような画面が表示されるため、設定をしていきます。
- クライアントIDの取得
クライアントIDをコピーして控えておいてください。 - Oauth設定
今回はStandardを選択します。 - リダイレクト
Oauth認証後のリダイレクトURLを指定します。今回はhttp://localhost/shop/dashboard/stripe_connectを指定します。
Oauth認証とアカウントID取得の実装
ここからは、サイトから店舗ユーザが、StripeにOauth認証でログインする部分を実装していきます。
Oauth認証用リンクの設置
Oauth認証用のURLは以下になります。
| 1 | https://connect.stripe.com/oauth/authorize?response_type=code&client_id=ca_hogehoge&scope=read_write&redirect_uri=http://localhost/shop/dashboard/stripe_connect |
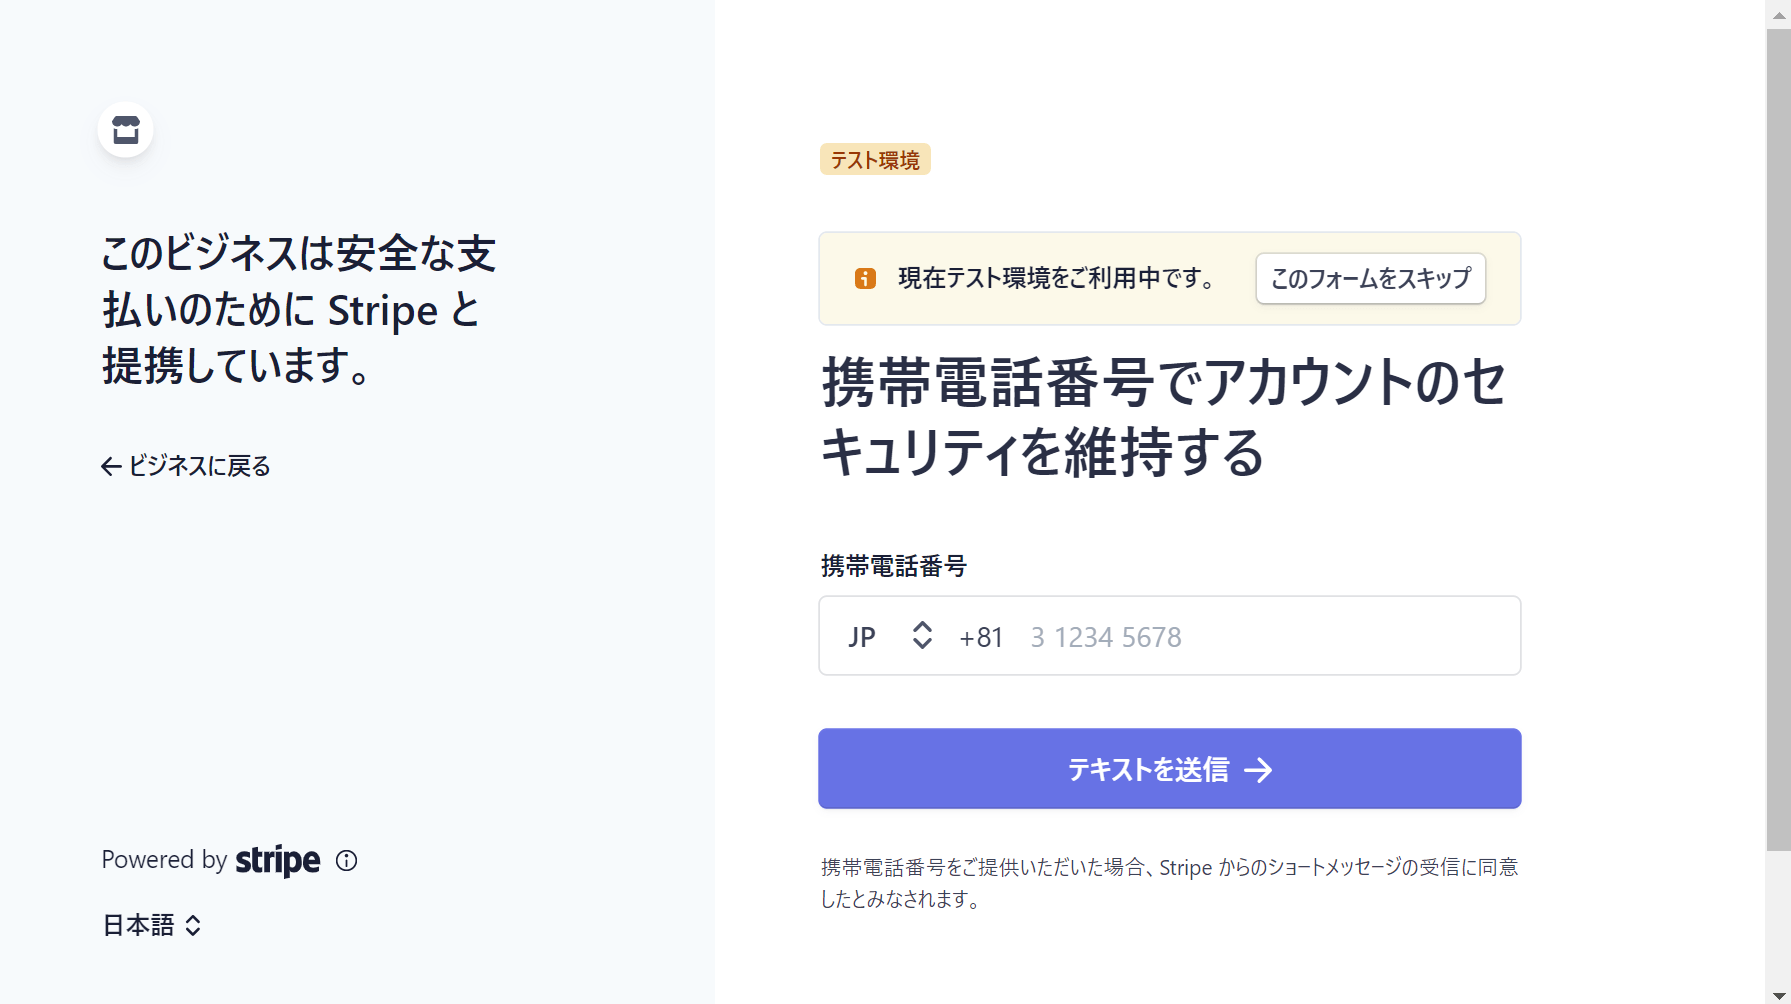
ca_hogehogeの部分には、先ほど取得したクライアントIDを指定してください。redirect_urlには、先ほど登録したリダイレクトURLを指定してください。
このリンクにアクセスすると、以下のようなStripeの登録・ログイン画面に遷移します。ここで、店舗はStripeアカウントでログインするか、新規登録することになります。
コードの取得とStripeアカウントIDの取得
認証が終わるとコード付きでリダイレクトされるので、そのパラメータを使用してStripeからアカウント情報を取得します。まずは、先ほどリダイレクト先に指定したルーティングから実装していきます。
web.php
| 1 2 3 4 5 | <?php use Illuminate\Support\Facades\Route; Route::get('/shop/dashboard/stripe_connect', [\App\Http\Controllers\Shop\DashboardController::class, 'stripeConnect']); |
次に、Controllerを実装していきます。
DashboardController.php
| 1 2 3 4 5 6 7 8 9 10 11 12 13 14 15 16 17 18 19 20 21 22 23 24 25 26 27 28 | <?php namespace App\Http\Controllers\Shop; use App\Http\Controllers\Controller; use Illuminate\Http\Request; use Illuminate\Support\Facades\Auth; use Stripe\OAuth; use Stripe\Stripe; class DashboardController extends Controller { public function stripeConnect(Request $request) { Stripe::setApiKey(env('STRIPE_SECRET')); // Stripeからのクエリパラメータを取得 $params = $request->toArray(); $params['grant_type'] = 'authorization_code'; // grant_typeのみ直接指定する $response = OAuth::token($params); // パラメータを使用してアカウント情報を取得 // StripeアカウントIDを店舗テーブルに保存 $shop = Auth::guard('shop')->user(); $shop->stripe_account_id = $response->stripe_user_id; $shop->save(); return redirect('/shop/dashboard'); } } |
Stripeからは、リダイレクトのURLパラメータに、
code
というパラメータが取得できます。これが認証に必要なコードなのですが、
Oauth::token()
にパラメータごと渡すと、Stripeアカウント情報が取得できます。この中に
stripe_user_id
という “acct_”から始まる文字列が、Stripe ConnectでのAPI呼び出しに必ず必要になるため、店舗テーブルに保存しておきます。
Stripe Connectでの決済
ここからは実際に決済する部分を実装していきます。
ルーティング
商品の購入ページと購入処理用のルーティングを追加します。
| 1 2 | Route::get('/products/{product}', [\App\Http\Controllers\ProductController::class, 'show']); Route::post('/products/{product}/buy',[\App\Http\Controllers\ProductController::class, 'buy']); |
商品購入ページの実装
コントローラーはシンプルですが以下になります。
ProductController.php
| 1 2 3 4 5 6 7 8 9 10 11 12 13 14 15 16 | <?php namespace App\Http\Controllers; use App\Models\Product; use Illuminate\Http\Request; use Stripe\PaymentIntent; use Stripe\Stripe; class ProductController extends Controller { public function show(Product $product) { return view('product.show', compact('product')); } } |
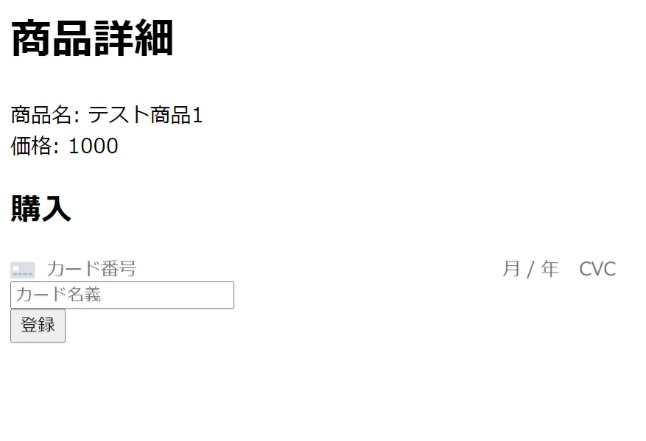
viewも実装していきます。カード情報を入力するフォームを表示し、決済できるようにします。
| 1 2 3 4 5 6 7 8 9 10 11 12 13 14 15 16 17 18 19 20 21 22 23 24 25 26 27 28 29 30 31 32 33 34 35 36 37 38 39 40 41 42 43 | <h1>商品詳細</h1> 商品名: {{ $product->name }}<br> 価格: {{ $product->price }} <h2>購入</h2> <form id="payment-form"> <div id="card-element"> <!-- ここにカード番号・有効期限・CVCの入力フォームが表示される。 --> </div> <input type="text" id="name" placeholder="カード名義"> <!-- エラーメッセージの表示 --> <div id="card-element-errors" role="alert"></div> <button type="submit">登録</button> </form> <form id="update-payment-form" method="post" action="/products/{{ $product->id }}/buy"> @csrf <input type="hidden" name="payment_method_id" id="payment-method-id"> </form> <script src="https://js.stripe.com/v3/"></script> <script> // Elementsの表示 let stripe = Stripe('{{ env('STRIPE_PUBLIC') }}', { stripeAccount: '{{ $product->shop->stripe_account_id }}' }); let elements = stripe.elements(); let card = elements.create('card'); card.mount('#card-element'); card.on('change', function (event) { displayError(event); }); function displayError(event) { let displayError = document.getElementById('card-element-errors'); if (event.error) { displayError.textContent = event.error.message; } else { displayError.textContent = ''; } } </script> |
まずは、ここまで実装すると以下のようなページが出来上がります。
カード情報の送信
ここからは、実際に決済する処理を実装していきます。先ほどのviewファイルに以下のJSを追記します。
| 1 2 3 4 5 6 7 8 9 10 11 12 13 14 15 16 17 18 19 20 21 22 23 24 25 26 27 28 29 30 31 | // カード情報をStripeに送信 var form = document.getElementById('payment-form'); form.addEventListener('submit', function (ev) { ev.preventDefault(); createPaymentMethod(); }); // 登録ボタンを押したときの処理 function createPaymentMethod() { let billingName = document.querySelector('#name').value; stripe .createPaymentMethod({ type: 'card', card: card, billing_details: { name: billingName, } }) .then((result) => { if (result.error) { displayError(result); } else { // 支払方法をStripeに送信すると、paymentMethodが取得できるので、それをPOSTする。 var form = document.getElementById('update-payment-form'); document.getElementById('payment-method-id').value = result.paymentMethod.id; form.submit(); } }); } |
stripe.createPaymentMethod()
を呼び出してStripeにカード情報を送信します。成功するとPaymentMethodが取得できます。PaymentMethodはそのまま決済にも使用できるほか、Stipre顧客を作成し、顧客の支払方法として登録することもできます。(今回は、決済にのみ使用します。)
result.paymentMethod.id
がこの後の決済処理で必要となるパラメータなので、これをformにセットして、submitします。
決済処理の実装
先ほど取得したpayment_method_idを使用して、実際に決済する処理を実装していきます。
| 1 2 3 4 5 6 7 8 9 10 11 12 13 14 15 16 17 | class ProductController extends Controller { ・・・中略・・・ public function buy(Request $request, Product $product) { Stripe::setApiKey(env('STRIPE_SECRET')); // 決済処理 PaymentIntent::create([ 'payment_method' => $request->payment_method_id, // フロントで取得したpayment_method_idを指定 'amount' => $product->price, // 決済金額 'currency' => 'jpy' // 日本円を指定 ], [ 'stripe_account' => $product->shop->stripe_account_id // 支払う店舗のStripeアカウントIDを指定 ]); } } |
PaymentIntent::create()
メソッドは、任意の金額で決済するメソッドです。第一引数のパラメータは、Stripe Connectを使用しない場合と同じですが、第二引数がポイントです。
第二引数では、
stripe_account
キーに、支払先店舗のStripeアカウントIDを指定します。これを指定しないと、プラットフォームアカウント(大元のアカウント)への支払になってしまうため、注意してください。
stripe_account
を指定するAPI呼び出しは、他のAPIでも使用できるので、StripeConnectで店舗に関するAPIをリクエストするときは、この第二引数を指定する必要があると覚えておいてください。
さいごに
今回はStripe Connectの導入編でした。次回は、支払方法の管理について紹介したいと思います。
おすすめ書籍